
How do you solve sound issues with your Arctis 3?
Set up and pair your Arctis 3 microphone
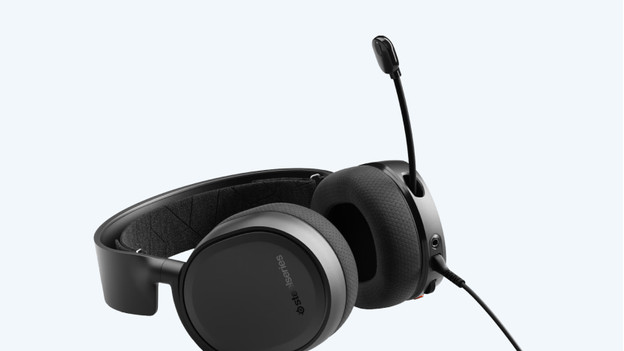
Connect your Arctis 3 and set up your microphone correctly. Follow the 3 steps below to solve volume problems.
Step 1. Connect your Arctis 3
Step 2. Position your microphone
Step 3a. Set up your microphone on your PC
Step 3b. Set up your microphone on your PlayStation
Step 3c. Set up your microphone on your Xbox
Step 1: connect your Arctis 3
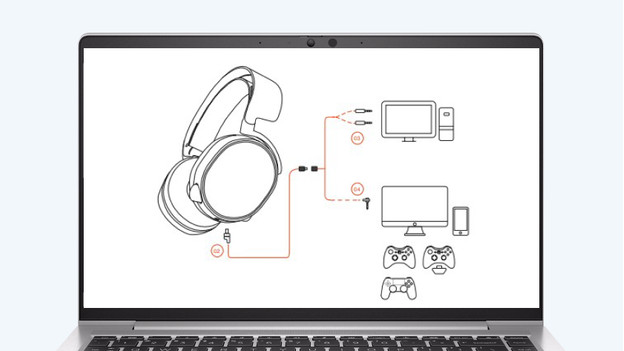
Start by setting up the Arctis 3. You can do so with the included cables. Follow the steps below to connect your headset to your PC and console.
Plug the main cable into the left ear cup of the headset. Plug the 3.5mm cable into the main cable. Plug the end of the 3.5mm cable into your PC or controller.
Your headset is now connected to your PC or console. Do you have an older PC? You need the included PC splitter.
Step 2: position your microphone
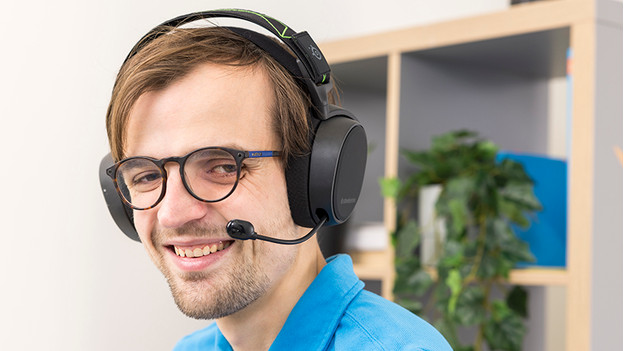
To be clearly audible for your friends, the position of the microphone is very important. Go through these steps to make sure they can hear you well.
- Slide the microphone out of the headset completely.
- Point the flat side of the microphone towards your mouth.
- Place the microphone 3.5cm away from the corner of your mouth.
Use the image as a guide, so you can be sure that you position the microphone correctly.
Step 3a: set up your microphone on your PC
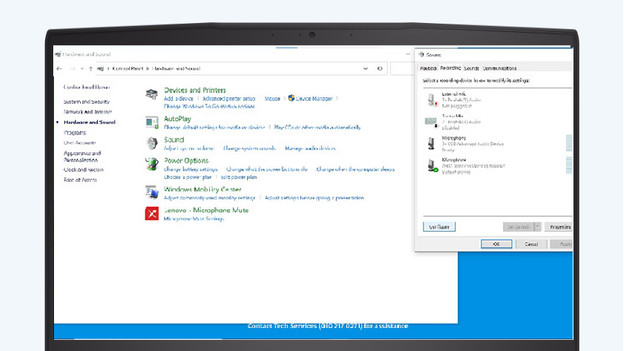
Follow the steps on your PC to set up your microphone.
-
Click on the magnifying glass next to the Windows logo in the bottom left corner.
-
Enter 'Control Panel' into the search bar and click 'Hardware and Sound'.
-
Click 'Sound'. A new window will appear.
-
In the first and second tab, check if the Arctis 3 is set up as the 'Default Device'.
-
If that's not the case, you can set it up as the default device in the bottom right corner via 'Set Default'.
-
Go to the 'Playback' tab and select your headset. Right-click and select 'Test' to test your microphone.
Is the volume still low? We're happy to help you in the next article.
Step 3b: set up your microphone on your PlayStation
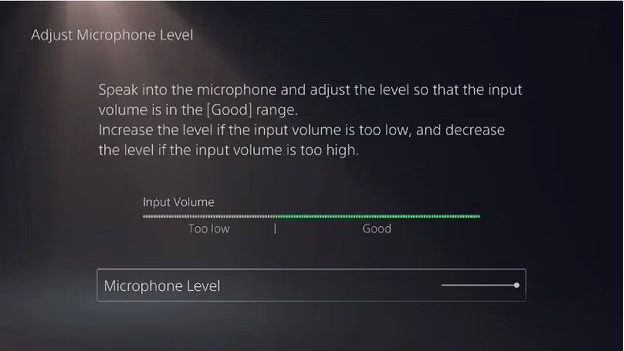
On the PlayStation, the steps are much easier. Follow the steps below to properly set up and test your microphone.
- Briefly press the 'PlayStation' button and open the 'Quick Menu'.
- Under 'Mic' check if your Arctis 3 is connected to your PS5.
- Select 'Adjust Mic Level' and test your microphone.
- Set up the Microphone Level until the bar is always in the center.
Do you have a PlayStation 4? Follow the steps in the following article.
Step 3c: set up microphone on Xbox
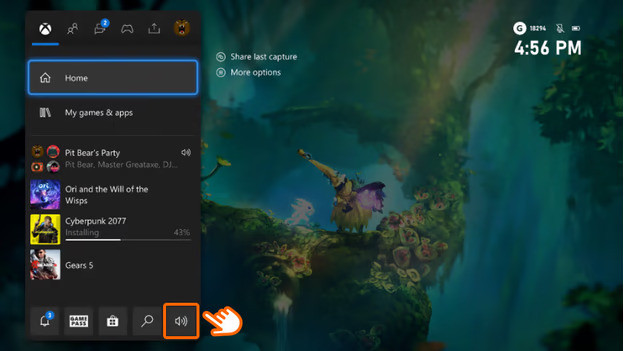
On the Xbox console, it works differently. Follow the steps below to set up your headset correctly.
- Briefly press the 'Xbox' button and select the 'speaker' icon.
- In the 'Audio and music' menu, scroll down to 'Mic monitoring'.
- Set up the volume of your microphone until you're clearly audible.
Do you need more tips? Read the article below.


