How do you set up the sound of your Xbox Series X/S headset?
Set up your headset on the Xbox Series X/S

Go through the following steps and adjust the audio settings of your Xbox Series X and S.
- Connect your gaming headset.
- Check your audio settings.
- Adjust the balance.
Step 1: connect your gaming headset

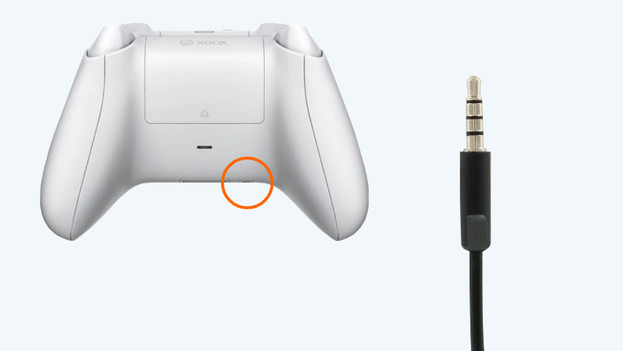
We don't go to the settings right away, because your headset needs to be connected first. With a wired gaming headset, you can plug the 3.5mm cable into the bottom of your Xbox controller. If you have a wireless headset, you can often connect it to your Xbox Series X or S via an included USB-A dongle. Plug it into the USB port of your Xbox, the headset will be connected after this. Doesn't your gaming headset connect to your Xbox? You probably have a gaming headset that isn't suitable for the Xbox Series X or S.
Step 2: check your audio settings

When you use your gaming headset for the first time, the default mode is stereo sound. Go through the following steps to set up your surround sound.
- Choose 'Settings' at the home screen, followed by 'Volume and Audio output'.
- Go to 'Headset audio' on the right and choose 'Windows Sonic'.
After this, you can play your games in surround sound.
Step 3: choose the right balance

The last step is to change the balance between the game and chat audio. Go through the following steps to set the balance the way you like it.
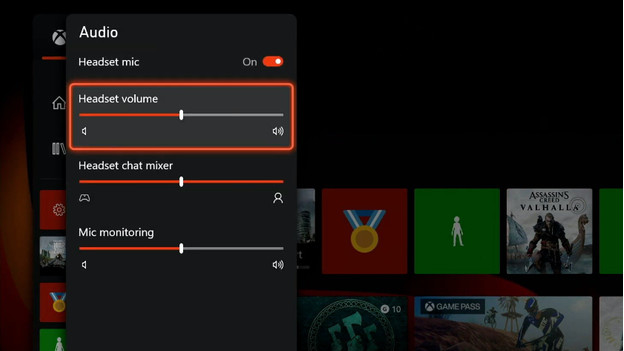
- Shortly press the Xbox key on your controller.
- Scroll down and select the speaker icon on the right side of the menu.
- Slide the bar of the 'Headset chat mixer' until you're happy with the balance.
You can hear your friends clearer now or emphasize your in-game audio.


