
How do you install the Disc Drive in your PS5 Slim Digital Edition or PS5 Pro?
Install a Disc Drive in 4 steps
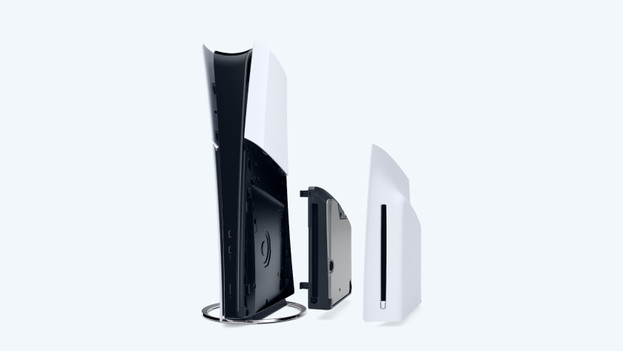
Installing the Disc Drive is easy. Follow the steps below to get started with your PlayStation quickly. Note: you can only use the Disc Drive with an internet connection.
- Prepare the PlayStation
- Open the PlayStation
- Install the Disc Drive
- Close the PlayStation
Step 1: prepare the PlayStation
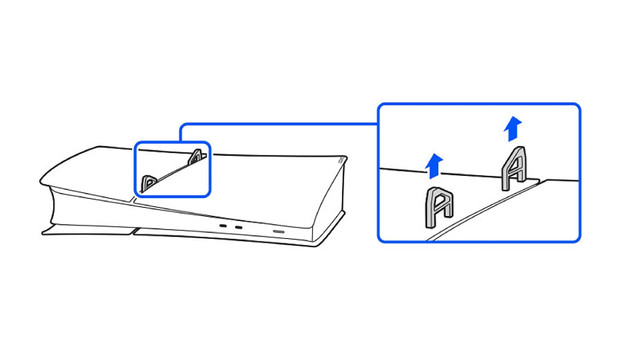
Before you start with the installation, you have to prepare the PlayStation 5.
- Turn off your PlayStation completely. You can do this via 'Power' and then 'Switch off' in the main menu of the PlayStation.
- Unplug all power cords and wait for the PlayStation to cool down.
- Place the PlayStation on a soft rug so you won't damage it.
- Remove the plastic leg stands of the PlayStation.
Step 2: open the PlayStation
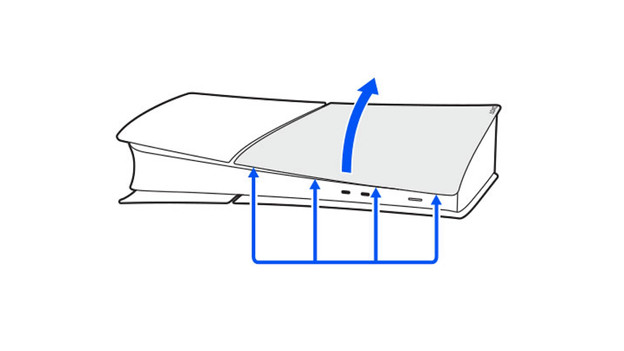
Now that the PlayStation is switched off and has cooled down, you can get started.
- Lift the cover of the PlayStation. Start at the thin back, where the PlayStation ports are located.
- The cover is attached to the PlayStation at 4 points. You can detach it from the cover there.
- Detach the cover and store it properly. You'll no longer need these.
Step 3: install the Disc Drive
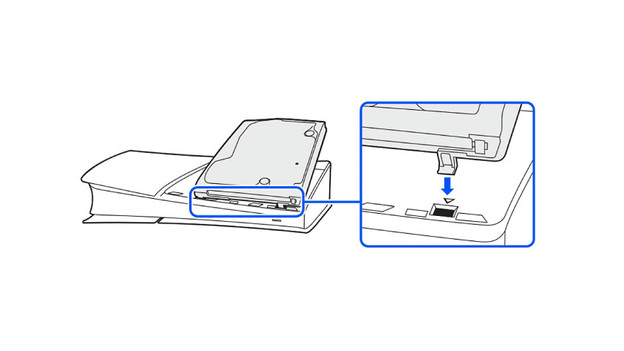
Attach the Disc Drive to the 2 holes of the PlayStation 5. Do this carefully, until you hear a click. The Disc Drive is now attached to the PS5.
Step 4: close the PlayStation
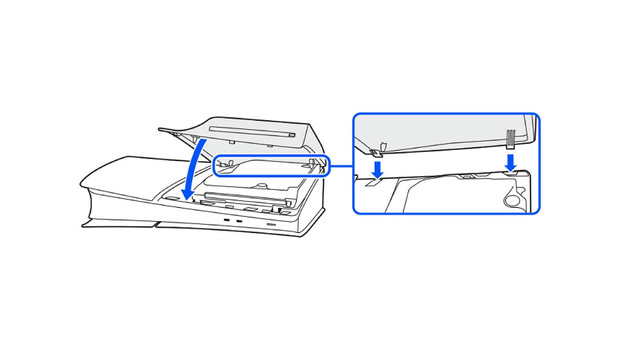
After you've installed the Disc Drive in your PS5 Slim Digital Edition or PS5 Pro, close the PlayStation again.
- Grab the new cover for the Disc Drive.
- Click the cover onto the front of the PlayStation 5.
- There are 4 points on the back you have to attach the cover to. Do this carefully, until you hear a click.
- Reattach the horizontal leg stands to your PlayStation and turn it over.
- Connect the power cord to your PlayStation and turn it on. The Disc Drive will work now.


