Written by Giorgos
Edited on
27 February 2025
·
15:40
How do you connect a Nintendo Switch to your gaming monitor?
You've chosen a gaming monitor for your Nintendo Switch, but how do you connect it? And what are the differences with a Switch Lite or Switch OLED? In this article, we'll explain how to do this step by step. That way, you can enjoy the best Nintendo Switch gaming experience via a gaming monitor.
Connect a Nintendo Switch in 4 steps
It's not difficult to connect a Nintendo Switch to a gaming monitor. To help you the best we can, we've listed all the steps and what you need for you:
- A Nintendo Switch
- A Nintendo Switch TV Dock with power supply
- A gaming monitor with HDMI 1.4 connector
- An HDMI 1.4 cable (included in the Nintendo Switch box)
- A cup of coffee
Step 1. Connect the Switch Dock
Step 2. Connect the Switch Dock to your monitor
Step 3. Connect the Switch to the Switch Dock
Step 4. Select the right source


Are there differences between the Switch Lite and Switch OLED?
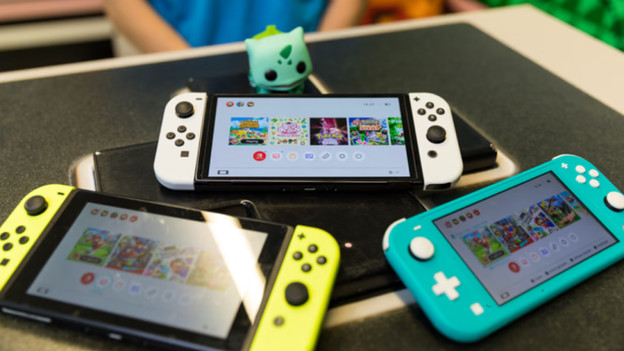
Besides the Nintendo Switch, there are the Nintendo Switch Lite and Nintendo Switch OLED. Do you already have a Switch Lite? Unfortunately, it won't work on a monitor. The Switch Lite doesn't have hardware to display the image on a larger display. The OLED does, and works in exactly the same way as a regular Switch. You'll just need an OLED gaming monitor for the same light effects. The disadvantage is that these aren't easily available yet and are pretty expensive. A regular Full HD gaming monitor is suitable too.

Step 1: connect the Switch Dock
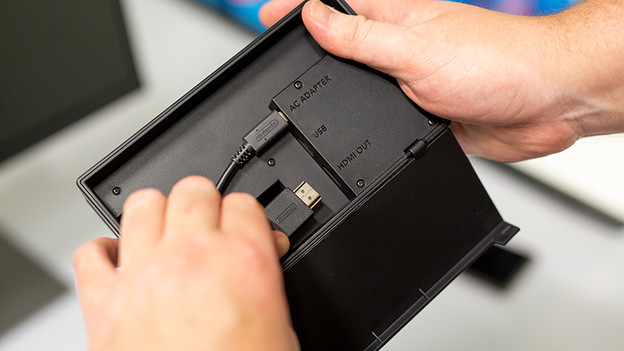
Before you get started with the Switch, you can connect the Switch Dock. Via this dock, you can transmit the signal to the monitor, instead of connecting the Switch directly to the monitor. Open the back of the dock and connect the HDMI cable and USB-C end of the power cable. You can recognize the USB-C port for the power supply by the text 'AC Adapter', and it's located at the top. You'll find the HDMI port at the bottom of the dock.

Step 2: connect the Switch Dock to your monitor
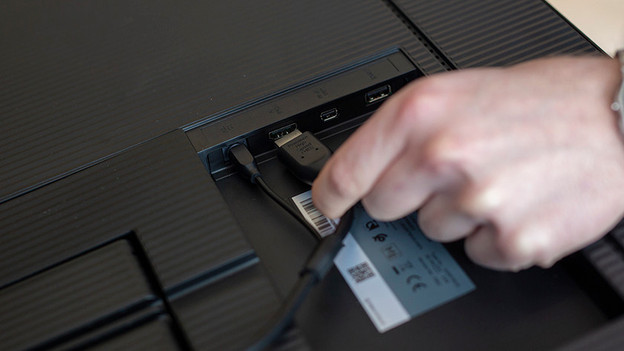
Plug the other end of the HDMI cable into the HDMI port of your monitor. Make sure to check whether you use HDMI 1 or HDMI 2, so you'll know on which source of your monitor it'll appear. Make sure the HDMI cable has enough length and isn't too tight or trapped behind the monitor. That will damage your cable, which will cause a bad signal or image loss. Make sure your Switch has enough room too. The fan is located on top of the console, which is why it's best to place it in a freestanding position. That way, the hot air can easily be exhausted.

Step 3: connect the Switch to the dock
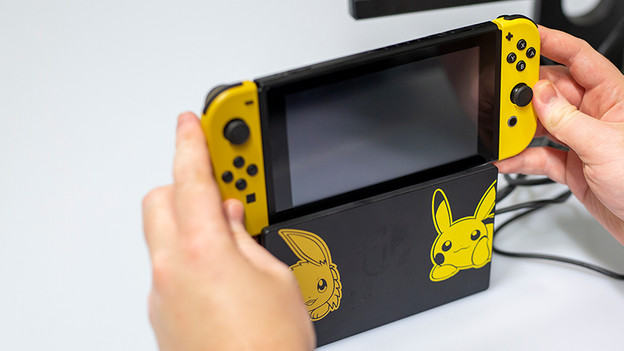
Now that the dock and monitor have been connected, you can place the Switch into the dock. Turn on the Switch and hold your console so that the + and - buttons are at the top. You'll now carefully lower the Switch into the dock until you feel it click. When you do this correctly, the display of your Switch will move to the monitor. If the image disappears from your Switch, but doesn't appear on your monitor, you've probably selected the wrong source.

Step 4: select the right source via the OSD of your monitor
Doesn't the Nintendo Switch work after connecting and booting your console? You've probably selected the wrong source. A monitor often has more than 1 port, so you'll have to look for the right source. You can do this via the OSD of your monitor, which you can open via the buttons on your monitor. Choose the tab that allows you to select an input source, often indicated with a square with an arrow inside. Select the HDMI port you've plugged the cable into.
Article by Giorgos
Monitor Expert.
