How do you set up the microphone of your Xbox Series X|S headset?
Set the microphone of your Xbox Series X and S gaming headset
You can make yourself audible via the microphone of your headset when you select the right settings. For this, you go through the following 4 steps.
Step 1: connect your gaming headset
Step 2: turn on the microphone
Step 3: determine the transmission volume
Step 4: choose the right balance
Step 1: connect your gaming headset

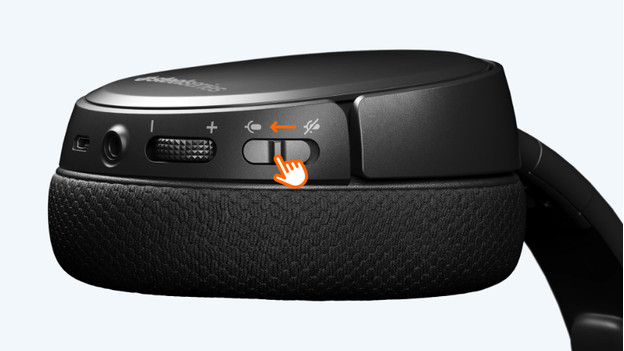
Connect your gaming headset to your Xbox Series X and S via a cable or a USB dongle. With a wired gaming headset, plug the cable into your headset and into the audio input of your controller. Do you have a wireless headset? Plug the USB dongle into the front of your Xbox Series X and S. When testing your microphone, it's also important that your microphone isn't on mute.
Step 2: turn on the microphone

To enable the microphone of your headset, follow the next steps.
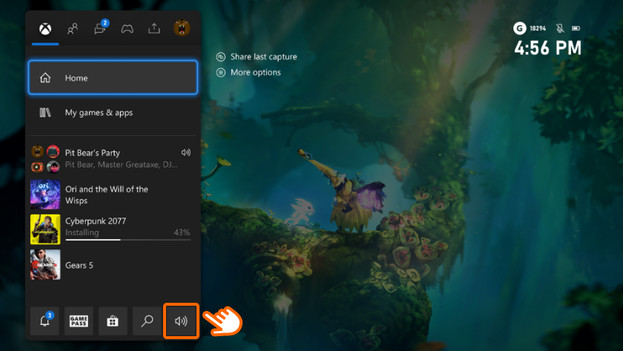
- Press and hold the Xbox button on your controller and go to 'Audio'.
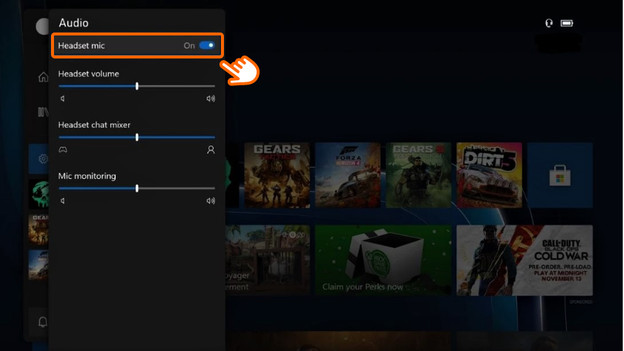
- Turn on 'Headset mic'.
From now on, you can talk via the microphone of your gaming headset and no longer via your controller.
Step 3: determine the transmission volume

You can decide the transmission volume in the 'Audio' menu. Follow the steps below to adjust this setting precisely.
- Press and hold the Xbox button on your controller and go to 'Audio'.
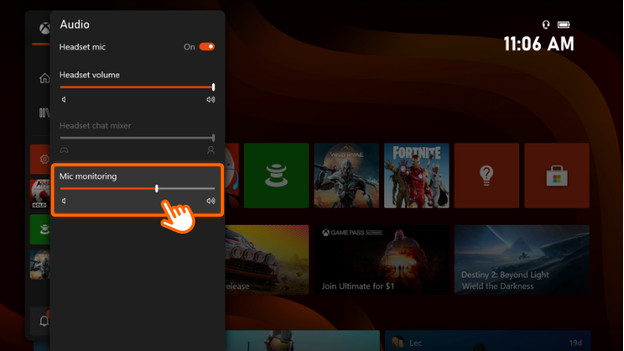
- Scroll down to 'Mic monitor'.
- Increase this until your friends can hear you clearly.
While raising the volume, ask if you don't sound shrill. If so, lower the transmission volume.
Step 4: choose the right balance

Do your friends hear you well, but you mainly hear the sounds of the game? Adjust the balance of your sound. To do this, follow the steps below.
- Press and hold the Xbox button on your controller and go to 'Audio'.
- Go to 'Headset chat mixer' and move the dot to the right.
Make sure you hear your friends well and you can also hear the game well enough.
Any questions about how to set up the sound on your Xbox Series X|S console? Read more on the page below.


