How do you set up your Sony TV?
Set up your Sony television in 11 steps
Set up your new Sony TV by following the step-by-step guide of our expert.
-
Step 1: before you start
-
Step 2: select your language and country
-
Step 3: connect the TV to the Google Home app
-
Step 4 (optional): set up Google Assistant
-
Step 5 (optional): choose your subscriptions
-
Step 6 (optional): set up Ambient mode
-
Step 7: set up basic TV
-
Step 8: set up your channels
-
Step 9: select the devices you want to set up
-
Step 10: position your TV
-
Step 11 (optional): register your TV
Step 1: before you start
Before you start wit the steps, keep the following in mind:
-
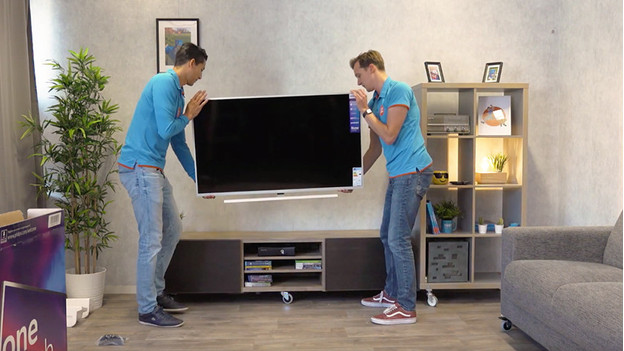
Put the TV in de desired spot.
-
Make sure you have a working WiFi connection.
-
Do you watch live TV? Connect your TV to a TV signal via the box of your provider, a CI+ module, or a coax antenna cable.
-
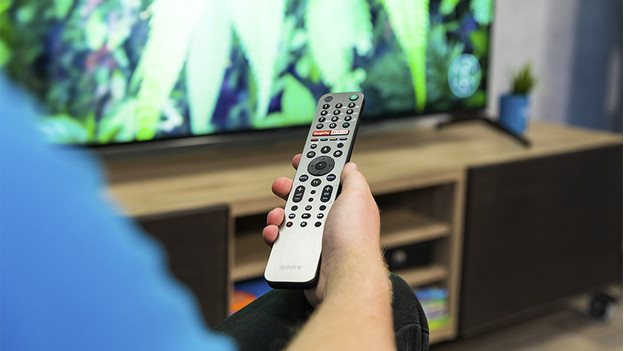
Put batteries in your remote.
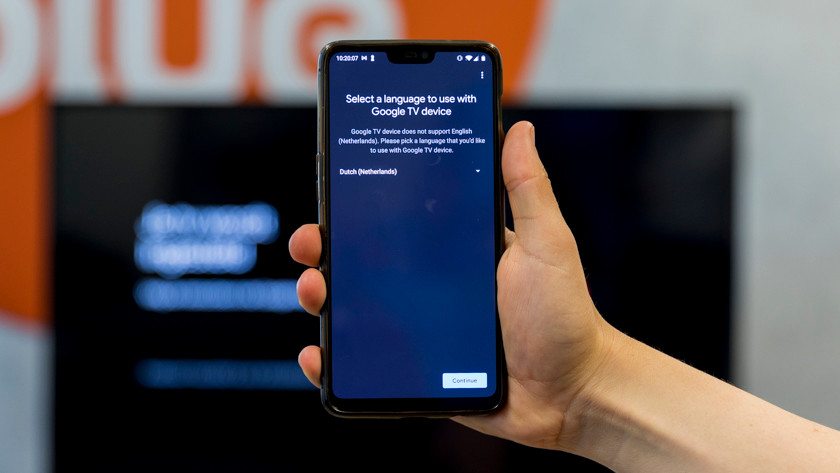
Step 2: select your language and country
-
Select the country you live in.
-
Select the desired language.
-
Select the country you live in.
-
Select the desired language.
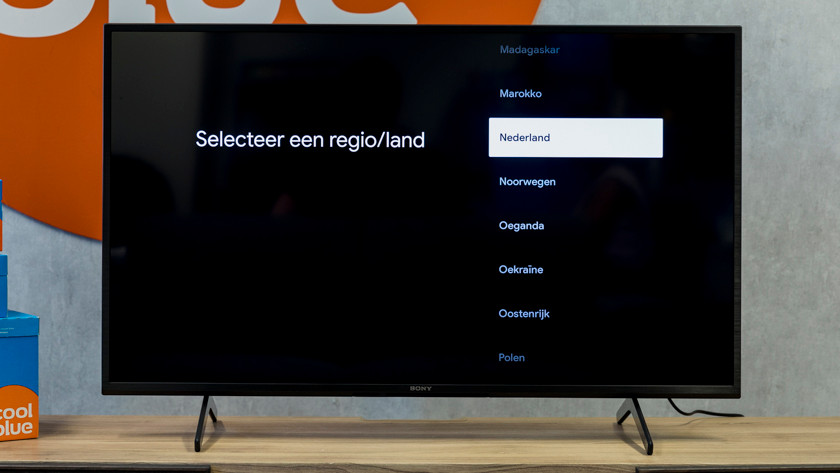

Select the language you understand for the menu. Then, select the country you live in.
Step 3: connect the TV to the Google Home app
-
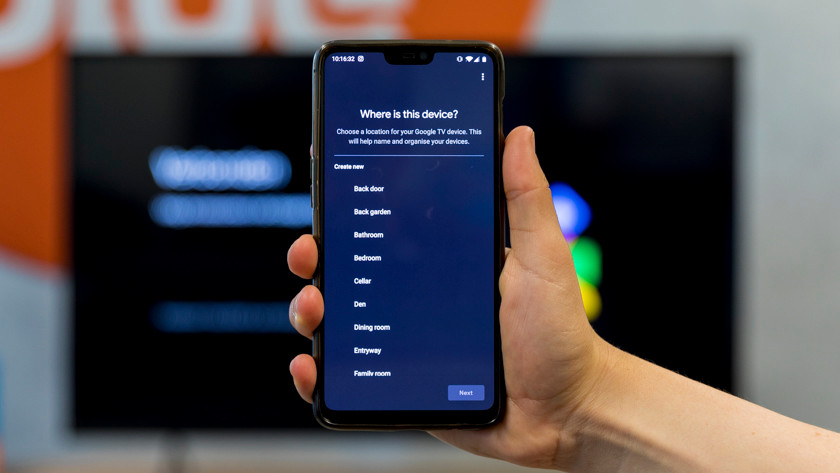
Indicate the location of your television.
-
Select 'Set up Google TV'
-
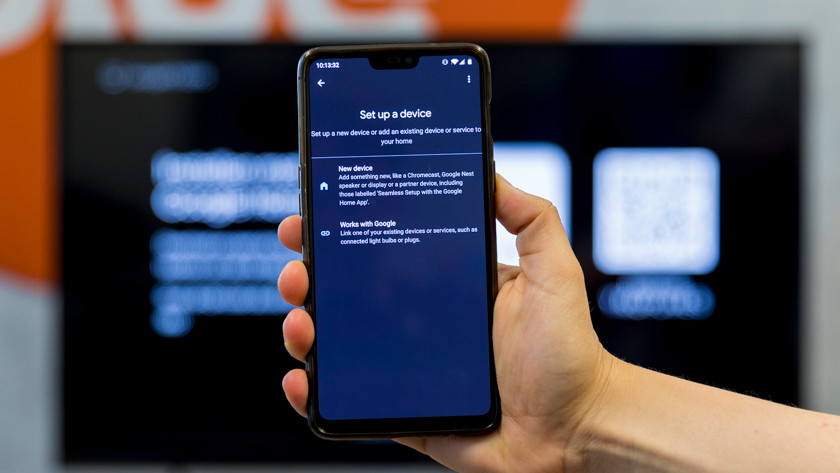
Select 'New device'.
-
Select a home or create a new home.
-
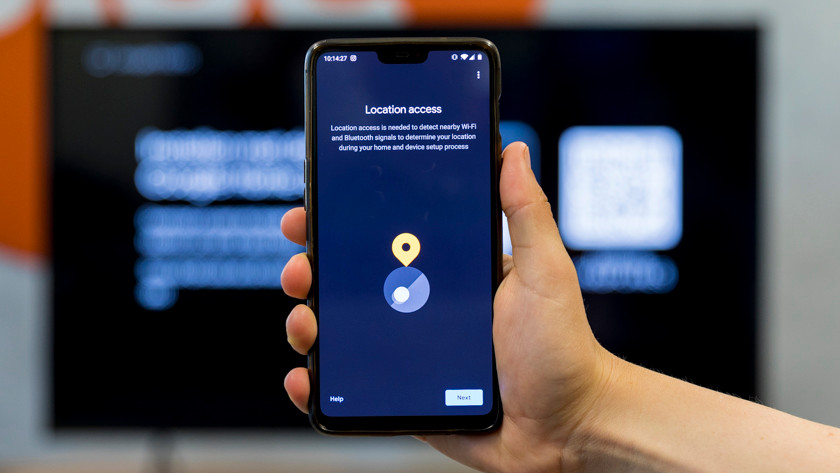
Location access.
-
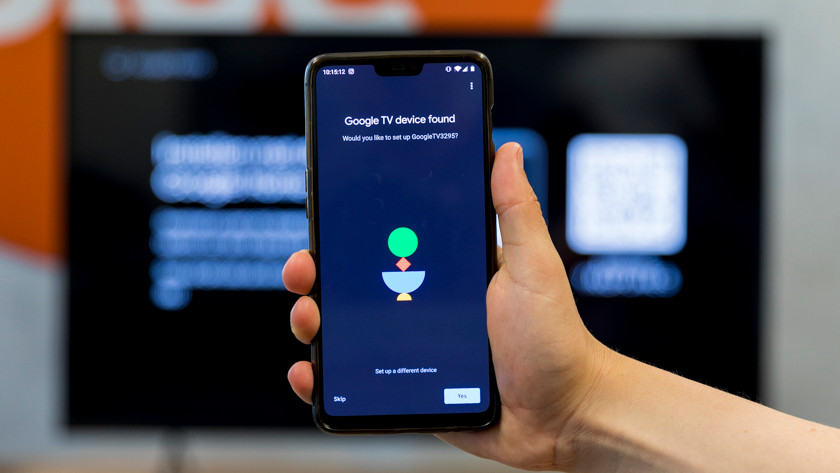
Your Google TV device is being detected.
-
Accept the conditions
-
Indicate the location of your television.
-
Select 'Set up Google TV'
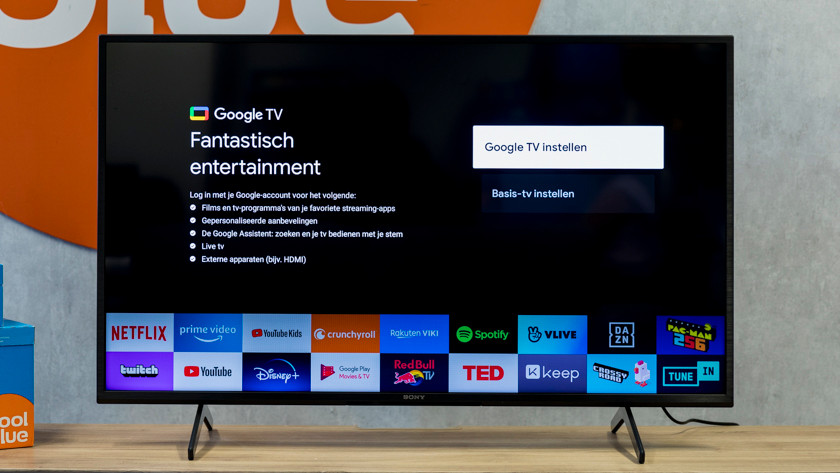


If you want to set up Google TV, follow these steps. Don't you want to? Go to step 8.
-
Set up Google TV:
-
Select 'Set up Google TV'.
-
Download the Google Home app in the app store of your mobile device.
-
Open the Google Home app.
-
Tap the plus icon in the app, in the top right of the screen of your smartphone or tablet.
-
Select 'Set up device'.
-
Select 'New device'.
-
Select 'New home' and create a home.
-
Select 'Next'.
-
Select 'Yes' when the Google Home app detects your television.
-
Select 'Accept'.
-
Indicate the location of your television.
Step 4 (optional): set up the Google Assistant
-
Choose if Google can store your voice recordings.
-
Select 'Next'.
-
Select 'Allow' or 'No, thanks'.
-
Choose a language for Google Assistant.
-
Repeat the sentence on your mobile device.
-
Choose if Google can store your voice recordings.
-
Select 'Next'.

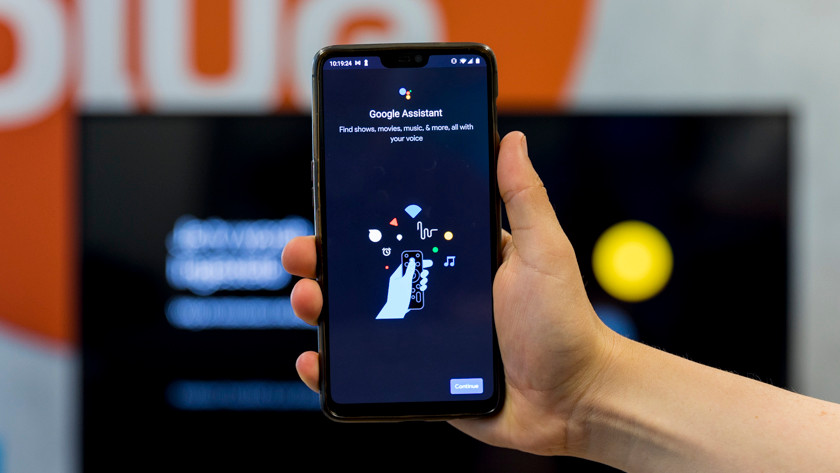
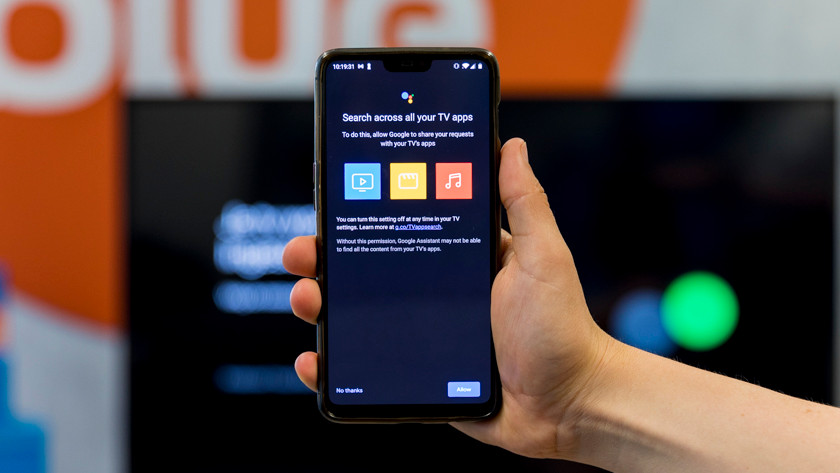
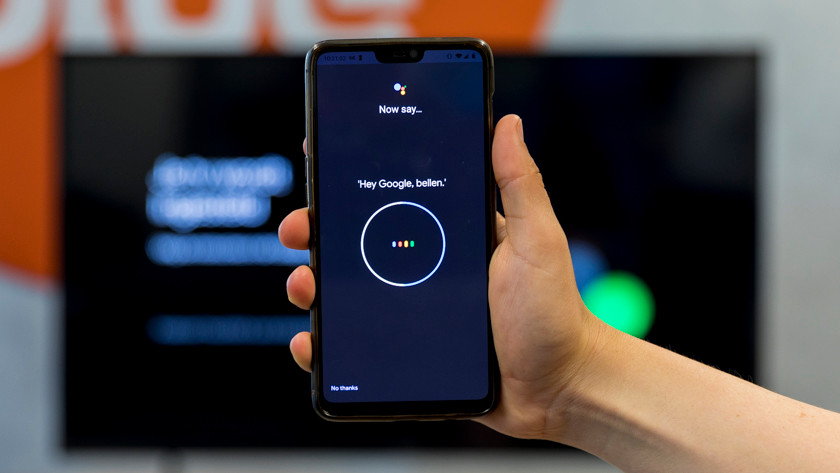
Set up Google Assistant in the following steps. This way, you can control the television with your voice.
-
Select 'Next'.
-
Select 'Allow'.
-
Select the language you want to use for Google Assistant.
-
Select 'Next'.
-
Select 'Next' again in screen that follows.
-
Select 'Agree' if you agree to the voice recognition function.
-
Repeat the sentence on your mobile device.
-
Select 'Start saving audio' if you want Google to save your voice recordings. Don't you want that? Select 'Not now'.
-
If you also want to use your voice to open personal information like your schedule or contacts on your television, select 'Agree'. If you don't, select 'No thanks'.
Don't you want to use the voice recognition of Google Assistant anymore? Click 'No thanks' in the bottom left of the app during each step.
Step 5 (optional): choose your subscriptions
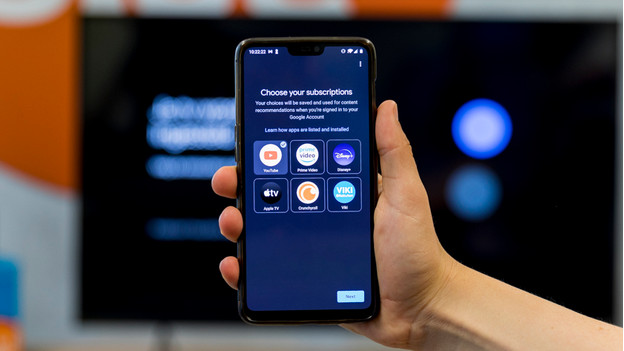
Select the apps you want to use on your television.
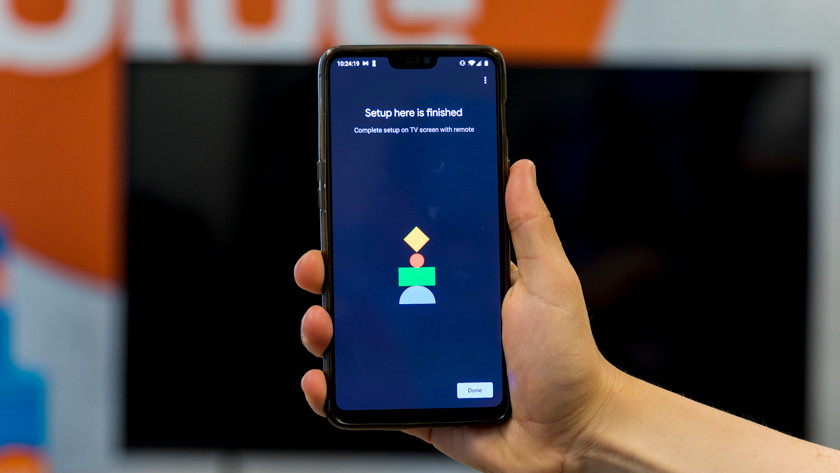
Step 6 (optional): set up Ambient mode
-
The setup is done.
-
Choose a form of 'Ambient mode'.
-
The setup is done.
-
Choose a form of 'Ambient mode'.
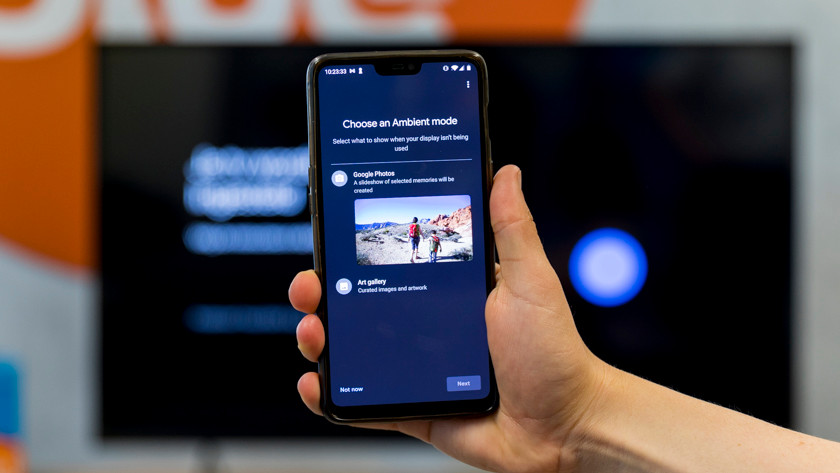
The 'Ambient mode' of Google displays images on your television when it's in standby mode. Select 'Google Photos' if you want to display your own photos on your television. Select 'Photo gallery' if you want to display images on your television that are chosen by Google.
Step 7: set up basic TV
-
Enter a new PIN.
-
Select 'Set up basic TV'.
-
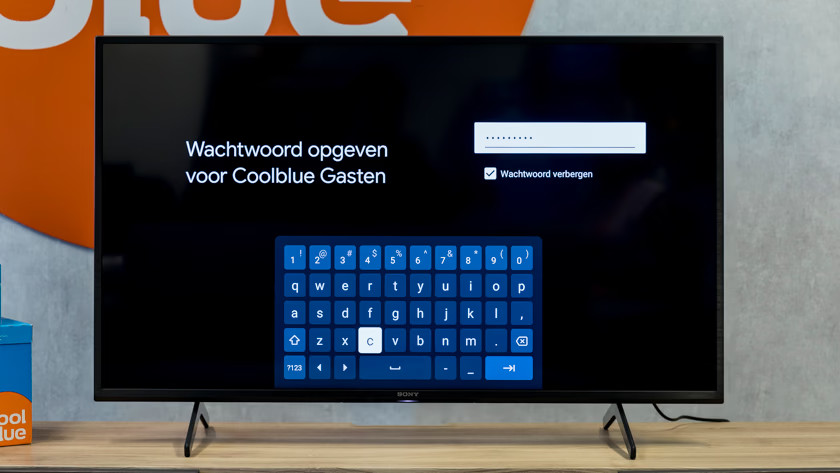
Select the WiFi network you want.
-
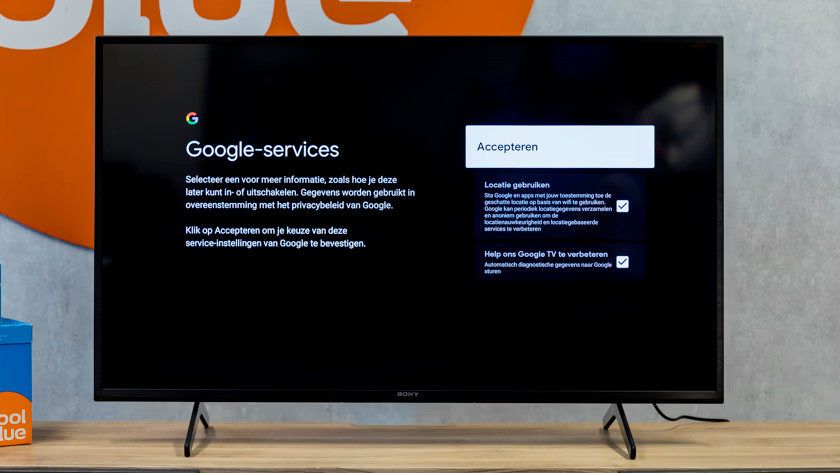
Accept the Google services.
-
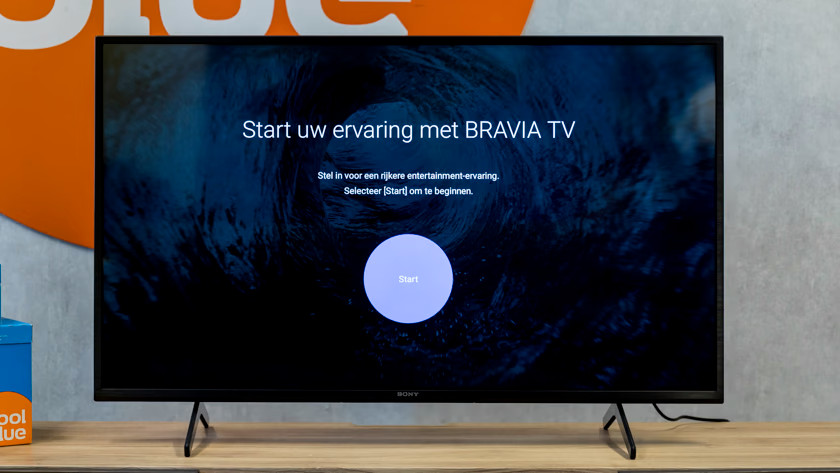
Start your Bravia TV experience.
-
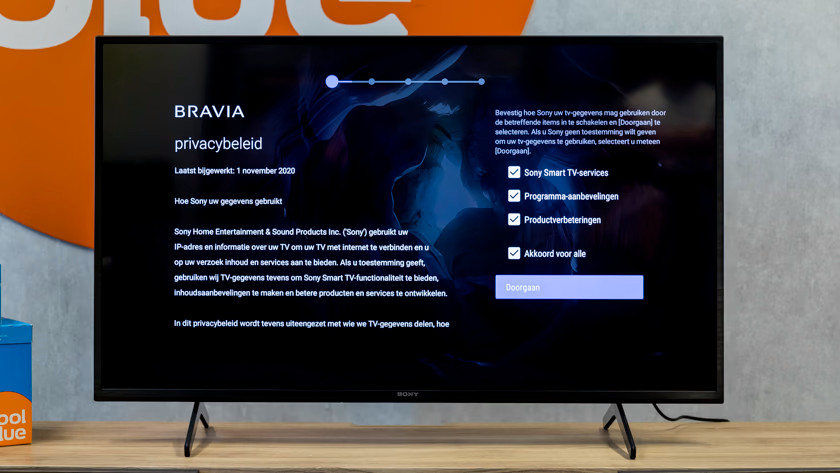
Accept the privacy policy.
-
Select 'I agree'.
-
Enter a new PIN.
-
Select 'Set up basic TV'.


If you don't want to use the options of Google TV and you only want to watch live TV and connect external devices, select the option 'Set up basic TV'.
Then, select the WiFi network you want, and enter the WiFi password, if necessary.
If you want Google to use the location of your TV to offer location-based services, select 'Use location'. If you want Google to use your information to improve the services, select 'Help us improve Google TV'. Then, click 'Accept'.
If you want, you can read through the privacy policy. If you want to allow Sony to use your information for Smart TV services, program recommendations, or product improvements, select the option or options you agree to.
Don't you want Sony to use your information? Select 'Continue'.
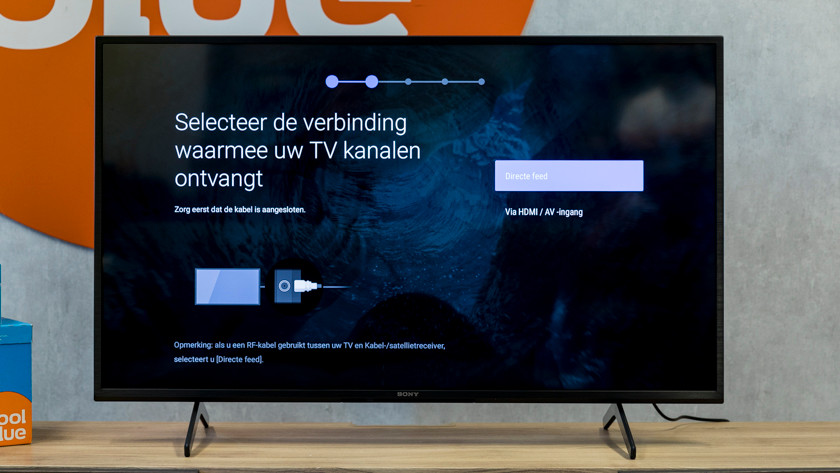
Step 8: set up your channels
-
Confirm the settings.
-
Select the way you want to receive channels.
-
Select the way you want to receive channels.
-
Select the connection.
-
The television looks for channels.
-
Confirm the settings.
-
Select the way you want to receive channels.
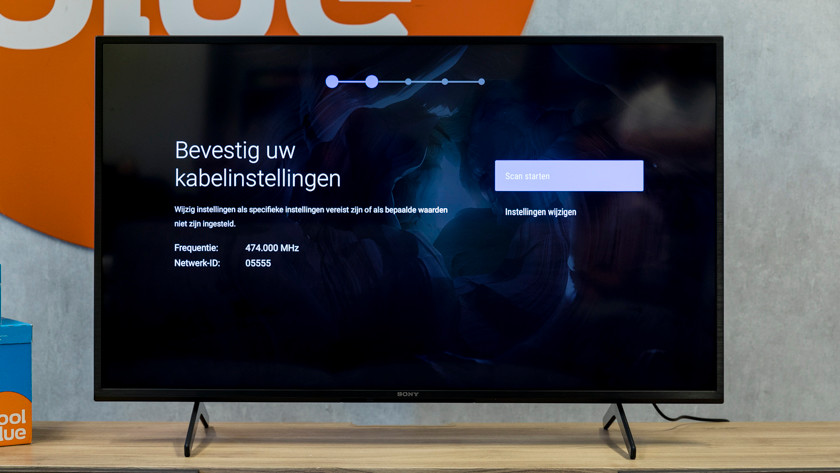
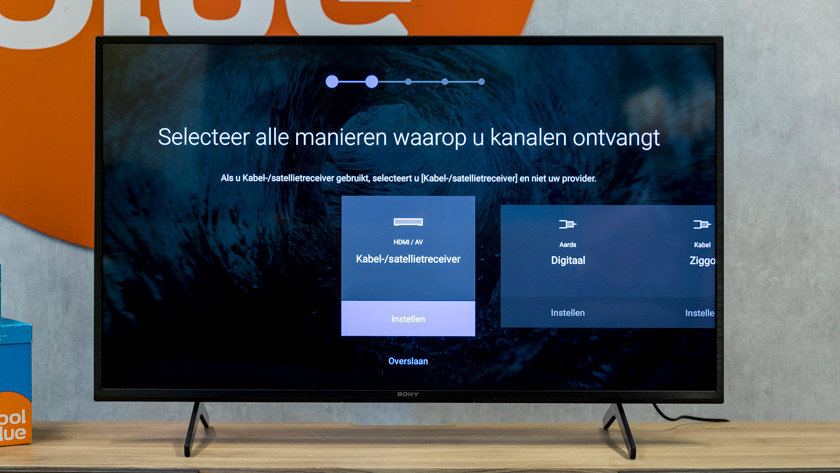
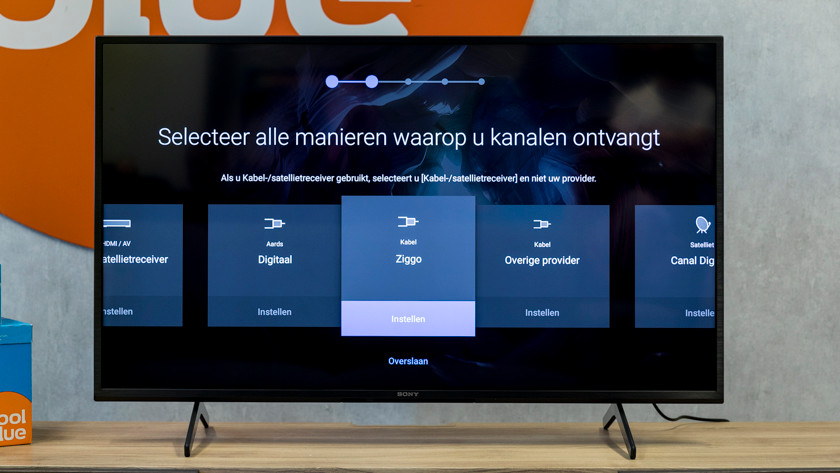
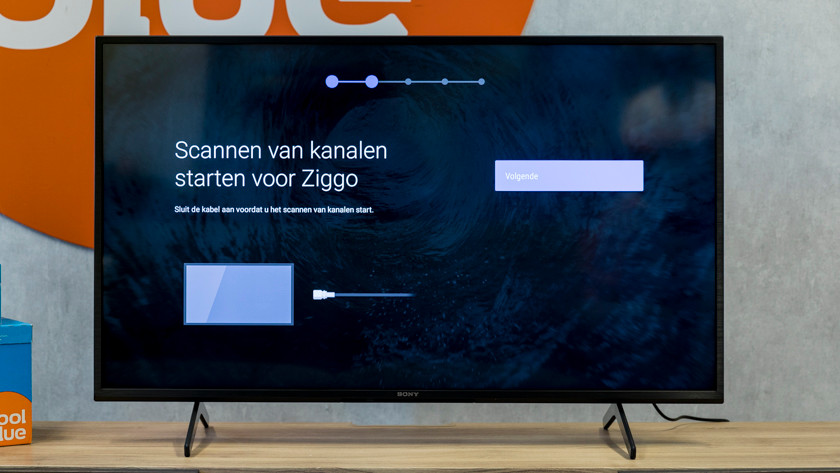
With these steps, you can set up the channels:
-
Make sure the TV is connected to the box of your provider, a CI+ module, or coax antenna cable.
-
Select the way you want to receive channels.
-
Next, select the connection with which you receive channels.
-
Confirm the settings by clicking 'Start scan'. Aren't they correct? Choose 'Change settings'.
Step 9: select the devices you want to set up
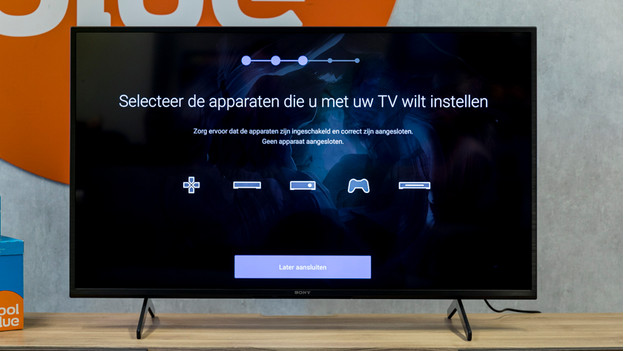
Connect all devices you want to set up to your television. Then, select the devices you want to set up with your remote.
Step 10: position your TV
-
Follow the instruction on the screen.
-
Indicate the position of your TV.
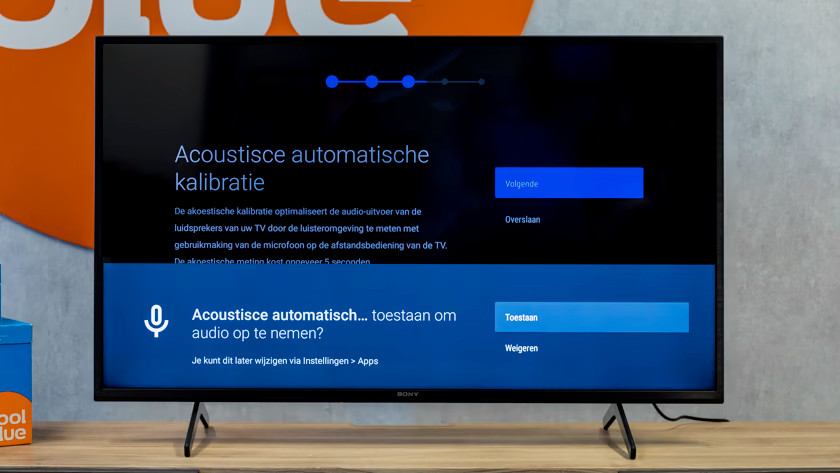
-
The television will calibrate the acoustics.
-
Select 'Allow'.
-
Follow the instruction on the screen.
-
Indicate the position of your TV.
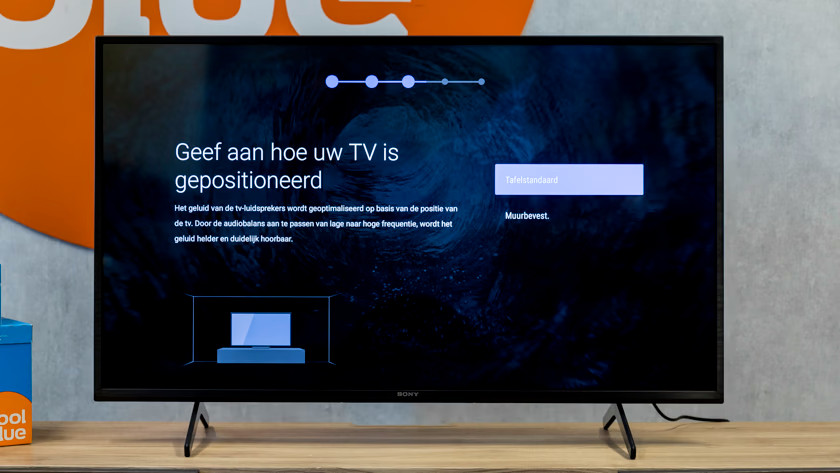
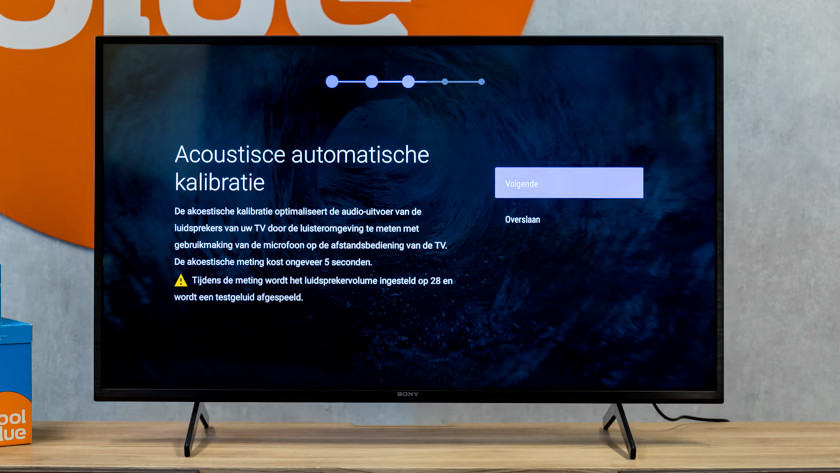
Did you put your TV on a TV cabinet? Choose 'Table stand'. Is you TV mounted to the wall? Select 'Wall-mounted'.
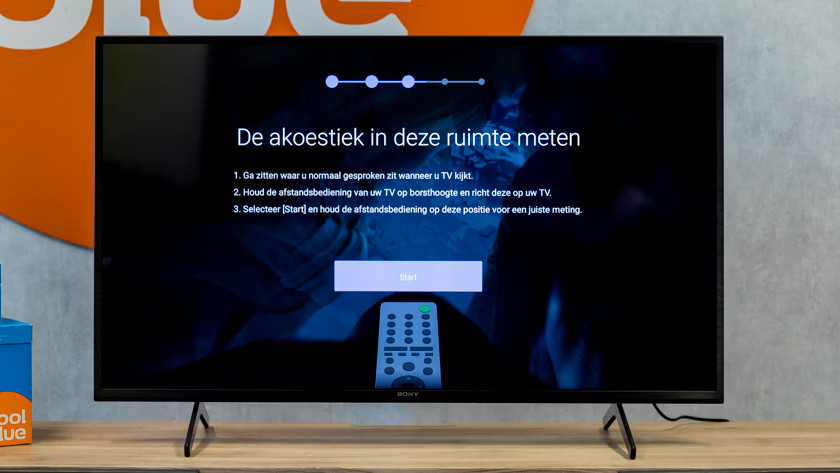
The TV measures the acoustics of your room. This is called calibrating. This way, it optimizes the quality of your speakers. Follow the steps below to calibrate.
-
'Next'.
-
Select 'Allow' and allow the TV to record audio.
-
Sit in the chair from where you would normally watch TV.
-
Keep the remote of your TV at chest height and aim it at the TV.
-
Select 'Start' and keep the remote in this position.
-
Relax the position when the TV indicates this.
Step 11 (optional): register your TV
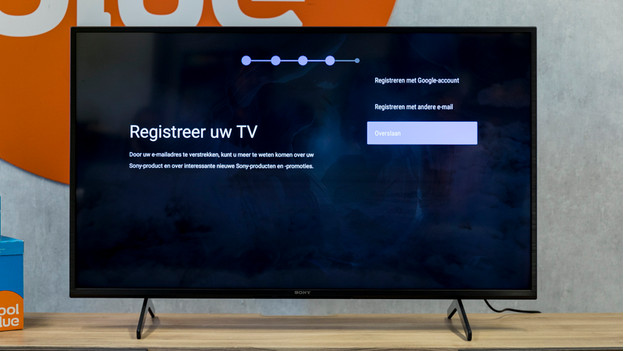
If you want to receive emails from Sony about your TV and other products and promotions, you can register. That's possible with your Google account or a different email address.
Don't you want this? Select 'Skip'.
Simba Interactive TV uses your personal information to personalize what it offers on your television.
Do you want to enable this? Select 'Next', and select 'Allow and enable'.
Don't you want to enable this? Select 'Next', and select 'Don't allow and disable'.
The setup of your TV is done. Your TV is ready for use.