
Written by Rowan
Edited on
5 March 2024
·
13:27
How do you set up split screen on your MacBook?
When you want to be as productive as possible, working with split screen is a great option. Thanks to split screen, you can use 2 apps full-screen side by side. That way, everything you need is shown in a clear overview. You can read how split screen works on your MacBook here. It takes some time getting used to in the beginning, but it's not complicated.
Split screen on MacBook
You can set up split screen on your MacBook or iMac via Split View. You can do this quickly in 4 steps.
- Step 1. Look up the macOS version
- Step 2. Set up Split View
- Step 3. Choose a setup
- Step 4. Close Split View

Step 1: look up the macOS version
To set up split screen, you'll need the right version of macOS. This should at least be OS X El Capitan. Check this by clicking the Apple icon at the top left of your screen. Click on About this Mac. In the window that appears, you'll be able to see if you have the right version of macOS. The version number should start with 10.11 or higher.
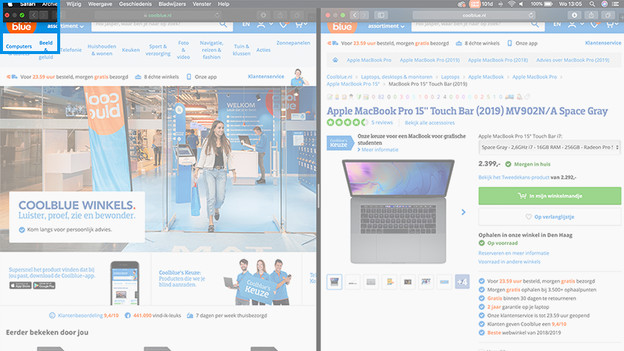
Step 2: Activate Split View
Via the green button
Use the green button in the title bar to set up Split View.
- First, open the 2 apps you want to use side by side.
- Click and hold the green button.
- Choose to place the window on the left or right side in the menu that appears.
- Choose the window you want to have next to the first window.

Via Mission Control
If you want to set up Split View via Mission Control, go through the following steps:
- Open the 2 apps you want to use side by side.
- Click on the green buttons in both windows to display them full-screen.
- Swipe 2 fingers upwards on the trackpad to open Mission Control.
- Drag one of the two apps over the other one and choose if you want to display it on the left or right side.
Step 3: choose a setup
Now that Split View has been activated, you can easily adjust the layout of the screen. You can do this with the bar in the center of the screen. Slide it to the left or right until you're happy with the result. Now, you can keep an overview while working in 2 apps at the same time. You can also easily drag images or text from one screen to the other.
Step 4: close Split View on my Mac
Done with multitasking? Close Split View again.
- Move your cursor to the top of the screen.
- Click on the green button in the menu bar that appears.
- Do the same for the other app that's now been displayed full-screen.