Written by Sem
Edited on
7 April 2023
·
07:14
How do you expand the PlayStation 4 storage?
With so many great games, every gamer comes to a point where they wonder if they have enough room on their PS4. In this article, we'll explain how to replace the hard drive of your PS4 with a fast SSD or HDD with more storage capacity step by step.
What do I need?
Replacing the HDD of your PlayStation isn't a huge task, but you still have to have a few things to make sure everything runs smoothly. Below, you can find all the gadgets you need to provide your PS4 with more storage capacity.
- A PlayStation 4, PS4 Slim, or PS4 Pro
- A 2.5-inch hard drive or SSD (at least 256GB)
- USB flash drive/External HDD (2x)
- A Phillips screwdriver
- A bowl for your screws
- A clean, well-lit surface
Preparation
Before we actually get started, there are a number of important steps to go through. First, make a backup of your data and get the PlayStation firmware ready.
Step 1: make a backup of your information
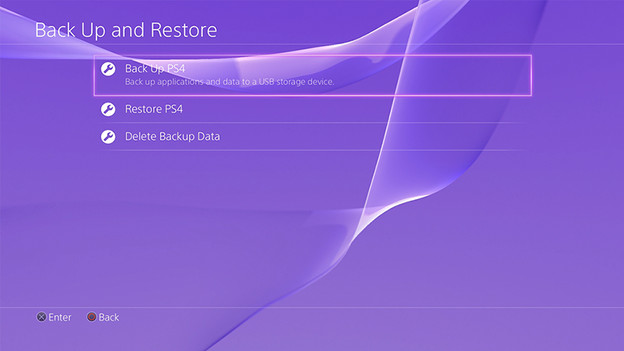
Connect your USB flash drive or external hard drive (depending on how much data you want to transfer) to a USB port on your PS4. Go to Settings/System/Systems backup and restore and select backup PS4. This can take up to an hour. If you only want to transfer your save games, it's also possible to upload them to your PlayStation Plus Account. If you have an active PS Plus subscription, navigate to Settings/ Application Saved Data Management Tool/Saved Data in System Storage/Upload to Online Storage. Select the save games you want to transfer and click the Upload button.
Step 2: download the software
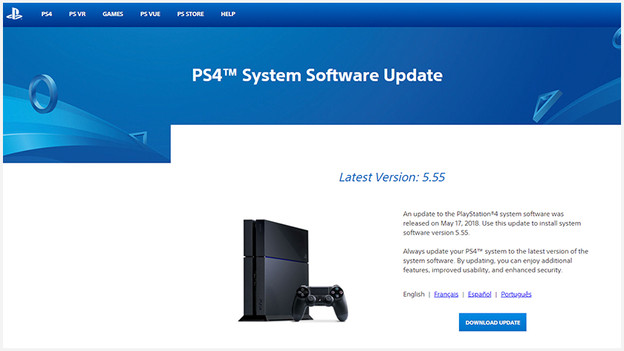
In order to use your new hard drive later, the PS4 has to install its firmware. Go to the PlayStation firmware page and download the latest software. Create a folder on the second USB flash drive called "PS4", and a folder called "Update" in it. Here, you can save the update file, which is called "PS4UPDATE.PUP". Use these names, so your PS4 will recognize the files.
Did the update finish downloading and is your date ready on the backup? You're ready to replace your hard drive.
Replace the hard drive
Nice, all your gamesaves and files are secured and the software for your new drive is ready on the USB flash drive. Now it's time for the real work.
Step 3: open the casing
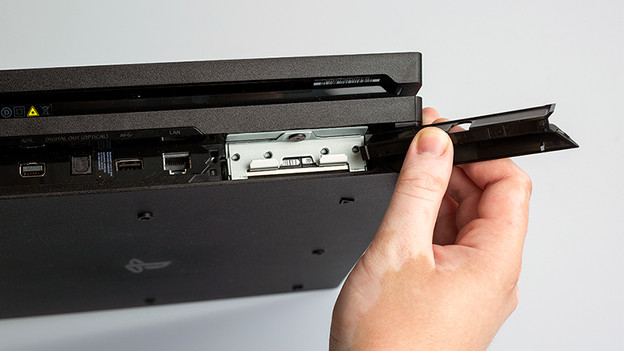
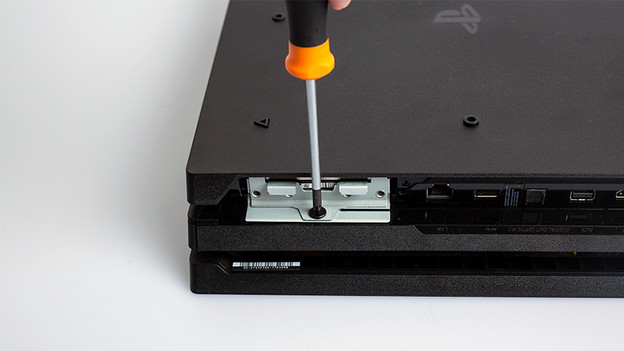
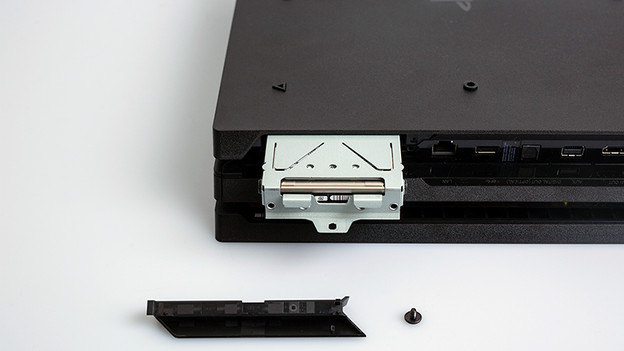
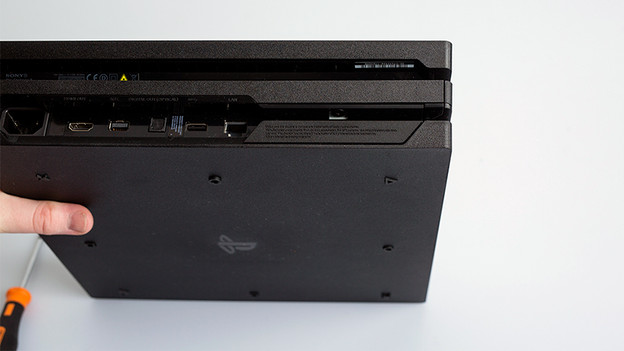
To avoid a shocking surprise, disconnect your PS4 from all cables and put it on a clean, well-lit surface. Carefully open the casing by clicking open the left panel (from the front), as displayed on the image. You'll now have access to the frame with the hard drive. Unscrew the screw on the front left. This will allow you to carefully remove the HDD bracket from the frame.
Step 4: replace the hard drive
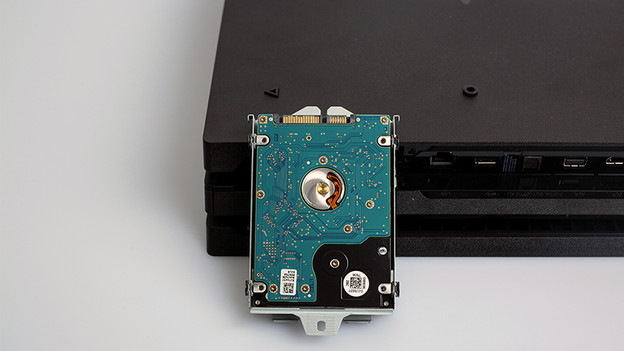
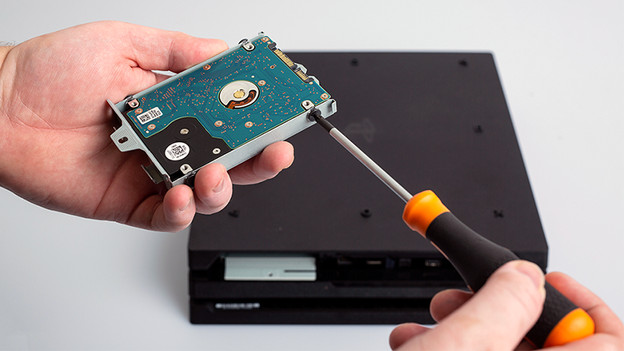
Unscrew the 4 screws on both sides and keep them well. Carefully slide the old HDD out of the housing (remember the way it's been installed). Take your new HDD or SSD and slide it into the HDD bracket in the same way. Screw the drive back on with the 4 screws. Slide the bracket back into the PS4 and screw it tightly to the PS4 with the first screw. Close the casing carefully.
Click off the cover
Place the PS4 upside down, so you can easily access the screw
Carefully unscrew the screw
Carefully pull the bracket out.
Look carefully and remember where the connectors are
Unscrew the screws and place the replacing HDD or SSD in the bracket in the same way. Now, put this back into the PS4 in the same way too.
Step 5: restore the software
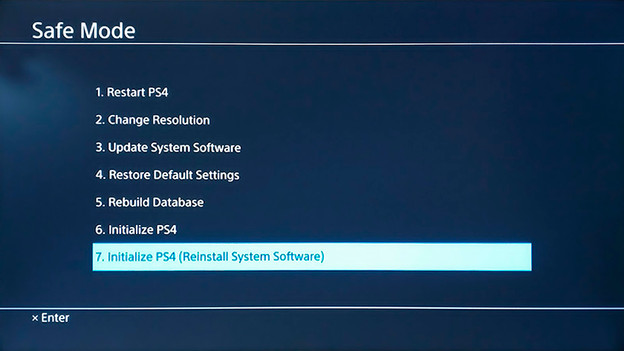
Connect your PS4 again, but don't turn it on yet. The PS4 needs to be booted in Safe Mode. Plug the USB flash drive with the pre-downloaded software into the USB port of your PS4. Connect your PS4 controller to the USB port with a cable. Press and hold the on-button for 5 to 7 seconds, until the PS4 boots in Safe Mode. In the option menu that's displayed, choose option 7 'Initialise PS4'.
Step 6: restore backup
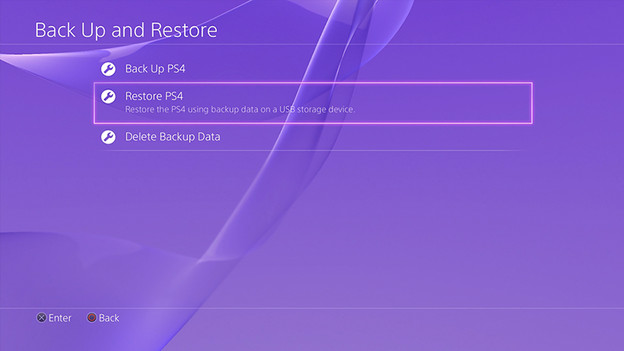
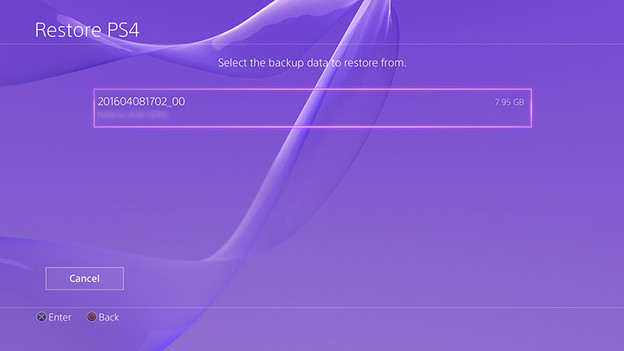
Now, it's time to restore your backup. Plug your backup flash drive or external hard drive into the USB port of the PS4. Navigate to Settings / System / Backkup and Restore again. Select Restore PS4 and select your backup drive. The PS4 will now restore all your information as it was. This can take up to an hour.
Stap 7: gaming
Pre-order and download any of the latest games you want, because you have more than enough space now.
Article by Sem
Gaming Expert.

