
Written by Prescious
Edited on
30 December 2024
·
08:50
Get started with the Armoury Crate on the ASUS ROG Ally
You bought the ASUS ROG Ally and want to use it right away. Before you can use the ASUS ROG Ally, you have to set up the ROG Ally software. This software is called Armory Crate SE. It's useful to know which settings you can adjust via the Armory Crate and what these settings mean. We'll explain what the most important settings are and what you can use them for here.
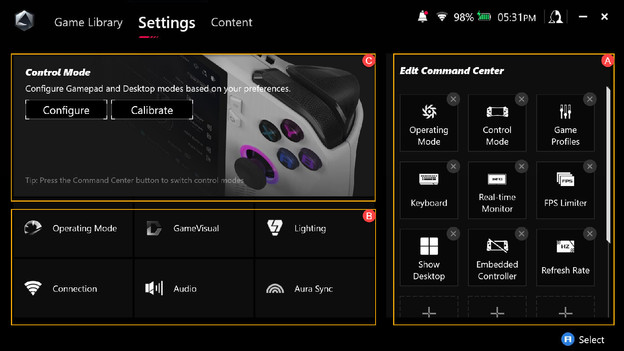
All the settings on the ASUS ROG Ally
There are many settings you can adjust in the Armory Crate of the ROG Ally. Each adjustment ensures that you can play your game with the best settings. The Armory Crate software from ASUS is divided into 3 different parts.
- Step 1. Adjust settings via Command Center
- Step 2. Adjust settings via Device Setup
- Step 3. Adjust settings via Control Mode
- Step 4. Advanced settings
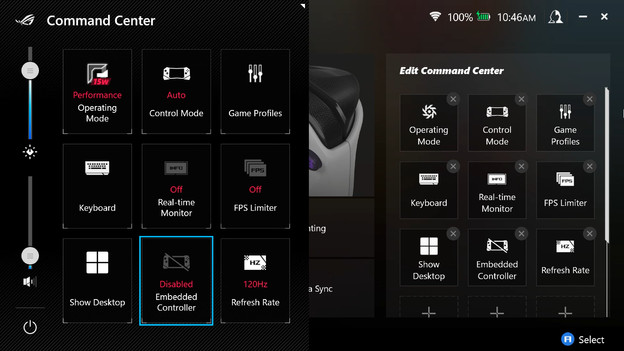
Step 1: settings via Command Center
Via the Command Center, you can easily change the most important settings that determine the power of the CPU and GPU.
Operation mode:
- Turbo 25W: the ROG Ally uses the maximum power of the device, but this consumes a lot of battery. This mode is ideal for games with a high frame rate. The ROG Ally produces a lot of noise with this setting.
- Performance 15W: the ROG Ally balances power, battery level, and temperature.
- Silent 10W: the ROG Ally uses little power and consumes less battery. This mode is ideal for light games. The ROG Ally produces little noise with this setting.
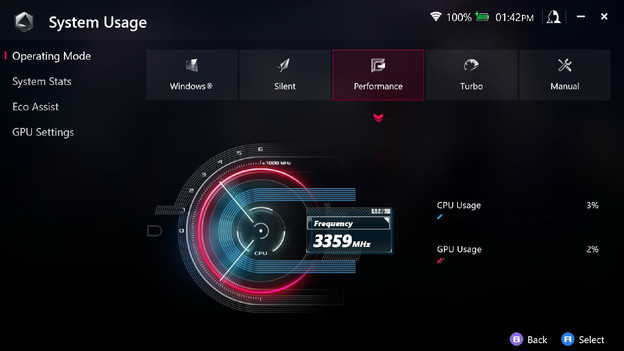
Step 2: settings via Device Setup
You can set various functions via Device Setup, such as Operation Mode and Game Visual.
- Operation Mode: change the performance of the different CPU/GPU modes from the Command Center.
- Game Visual: adjust the brightness and colors on the screen, so you can game with your personal image settings.
- Lightning: change the RGB lighting on ROG Ally.
- Connection: here, you'll find all your connected networks via Bluetooth and WiFi.
- Audio: adjust the sound settings of the ROG Ally.
- Aura Sync: sync the RGB lighting with other ASUS ROG devices.
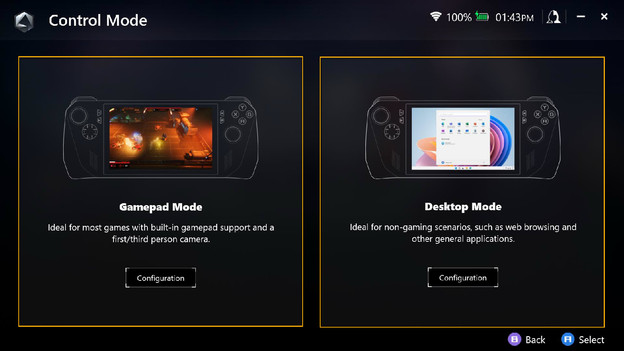
Step 3. settings via Control Mode
Via the Control Mode, you can switch between the 2 presets: Gamepad and Desktop mode. The Gamepad mode is ideal for gaming, while the Desktop mode is better for regular use. You can customize the different buttons via Key Mapping for Gamepad and Desktop mode. This allows you to customize your ROG Ally. You can also set the 'dead zone' for both modes. A dead zone is the zone when the joystick is registered. This prevents you from accidentally moving in-game.
Are you having problems with your controller or joystick? Recalibrate your controllers for the mode you're using, so all buttons register correctly again.
Step 4: Advanced Settings
These specific settings make your game even better. Note: your battery life or processing power may decrease.
- FPS limiter: the higher the frames per second setting, the more power and battery it costs. Do you game at a low frame rate? Your game may be less smooth.
- Radeon Image Sharpening: increase the quality of in-game graphics without adjusting the frames per second.
- Radeon Super Resolution: increase your game resolution in the driver without any quality issues.
- Hyperfan mode: set Hyperfan mode to turbo so that system performance is a top priority and the performance remains high. To do this, you must connect the ROG Ally to the socket.
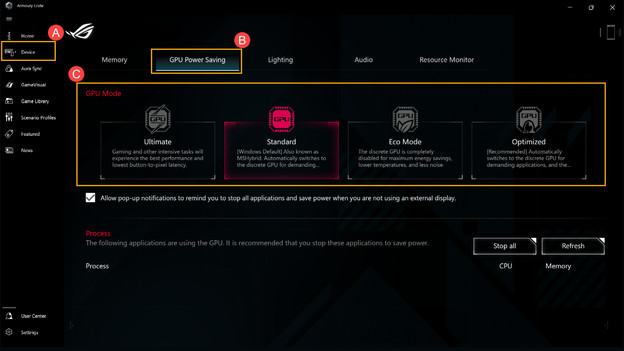
- GPU Power saving: reduce GPU consumption and improve cooling, battery life, and cooling noise.
Tips for ROG Ally
- Are you having problems with your ROG Ally? First, check whether Windows, the drivers, and other software is up to date.
- Only use 1 application or game while you're gaming. If you use more games or applications, the ASUS ROG Ally will run slower.
- Keep your ROG Ally clean so your gaming handheld always runs fast.
- For example, delete games or recordings from your ROG Ally if you no longer use them.
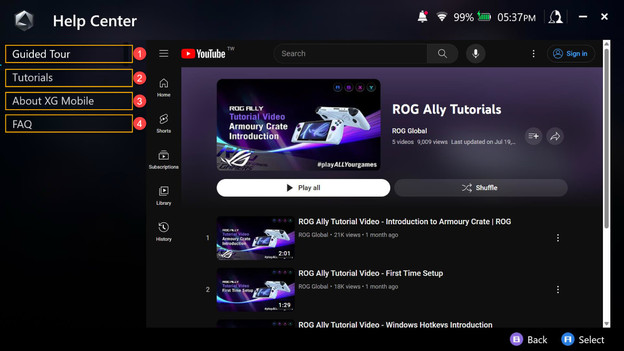
- Do you need more information and tips? View the Help Center on the ROG Ally or on the ASUS ROG Ally website.
Article by Prescious
Gaming Expert.
