
Written by Giorgos
Edited on
28 December 2022
·
11:19
How do you get external access to your Synology NAS via QuickConnect?
If you want to get external access to your Synology NAS , you can easily connect to a connected device remotely. If you want to watch a movie on your smartphone on the train, for example. You can get external access to your Synology NAS via QuickConnect. In this article, we'll explain how you can do that.
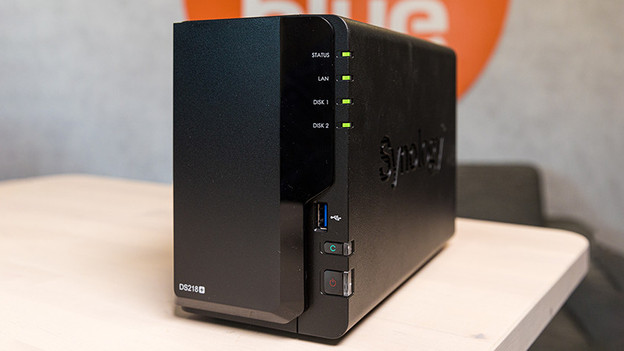
Get external access to your Synology NAS in 4 steps
It's not difficult to set up QuickConnect on your NAS. Did you enable port forwarding? Switch this off first. To help you as best we can, we've listed all of the steps and and requirements here:
- A Synology NAS
- A desktop or laptop connected to the internet
- A stable internet connection
- Set up QuickConnect on your NAS
- Create a QuickConnect ID
- Connect your device via QuickConnect
- Secure the connection of your NAS
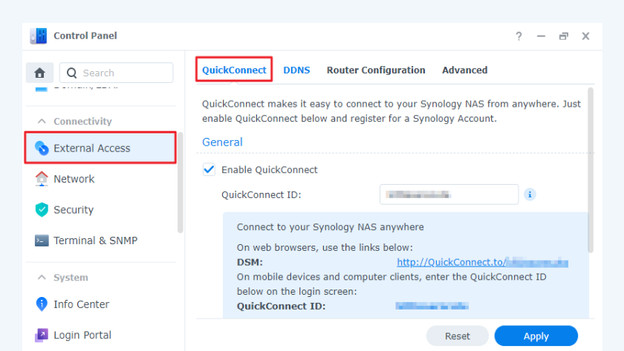
Step 1: set up QuickConnect on your NAS
How you can set up QuickConnect depends on which DSM version is installed on your Synology NAS. That's why you have to check whether your NAS has DSM 6.2 or lower, or 7.0 or higher.
- For DSM 7.0 and higher, go to 'Configuration screen' and click 'External access' under 'Connectivity'. Click the 'QuickConnect' tab and check the 'Enable QuickConnect' box.
- For DSM 6.2 and lower, go to 'Configuration screen' and check the 'Enable QuickConnect' box. You can find it at the top of the page.
Don't have a Synology account yet? Register with a new account, or log in with an existing account.
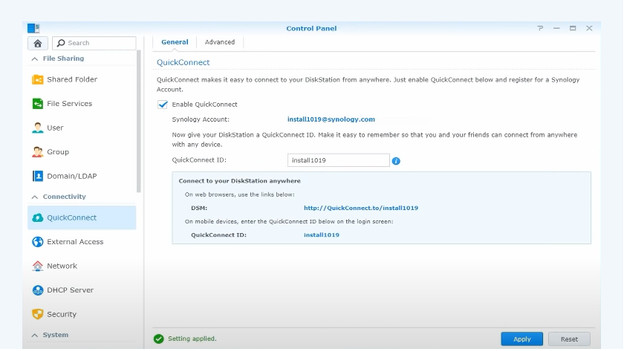
Step 2: create a QuickConnect ID
Once you've enabled it, enter a user name for your QuickConnect. You can find this below the checked box. Click 'Apply' after you check the privacy policy box. If your ID is available, it'll be shown with the address that gives you access to the DSM. Want to set other options or change permissions? Go to 'Advanced settings' if you have DSM 7.0 or higher, or go to the 'Advanced' tab if you have DM 6.2 or lower.
Step 3: connect your device via QuickConnect
Now that you've enabled QuickConnect on your NAS, it's time to connect your desired device. Because there are difference between a computer and smartphone, we'll help you do this.
-
On a laptop or desktop, open your web browser and enter your QuickConnect URL. The URL starts with http://quickconnect.to/ and ends with the QuickConnect ID you created. For example, http://quickconnect.to/voorbeeld. Then, click 'Enter' so you're redirected to the login screen.
-
On your smartphone, open or download a Synology-certified app, such as DS File. Enter your QuickConnect, DSM account and password and click 'Log in'.
Step 4: secure the connection of your NAS
Want to ensure extra security for your connection after you've set up QuickConnect? Consider the following options.
-
Enable 'Block automatically'. With this option, the NAS blocks IP addresses with too many login attempts. You should also enable account security to protect the connected accounts of clients with too many failed login attempts.
-
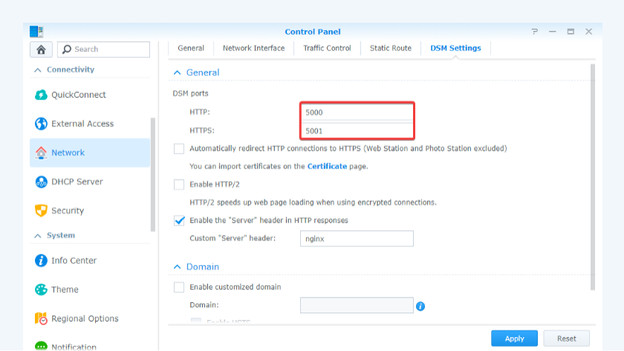
Create a HTTPS certificate to check the identity of a server before you share information.
-
Turn on a firewall to prevent unknown login attempts and to reject them.
Article by Giorgos
NAS Expert.
