How do you upgrade your Western Digital NAS to My Cloud OS 5?
Before you start

Before we discuss the update, we want to give you some extra information. NAS models that support My Cloud OS 5 won't support older versions after 15 January 2022. Older NAS models that don't support My Cloud OS 5 will lose support from 15 April 2022. When it's no longer supported, you can only access all your files in your local network. You won't have remote access to technical support and won't get updates anymore.
Is your WS NAS suitable for My Cloud OS 5?
The update from older My Cloud OS versions to My Cloud OS 5 is possible with the next models:
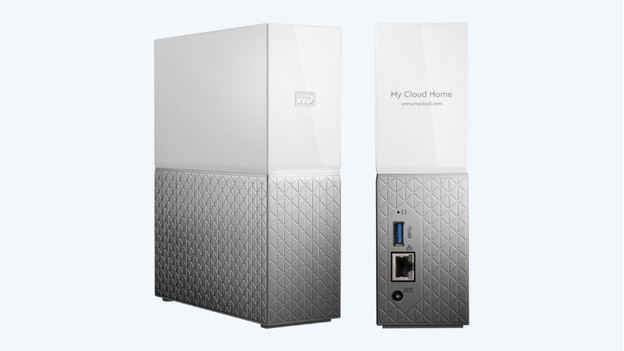
- My Cloud Home (no action needed)
- My Cloud Home Duo (no action needed)
- My Cloud
- My Cloud Mirror (2nd generation)
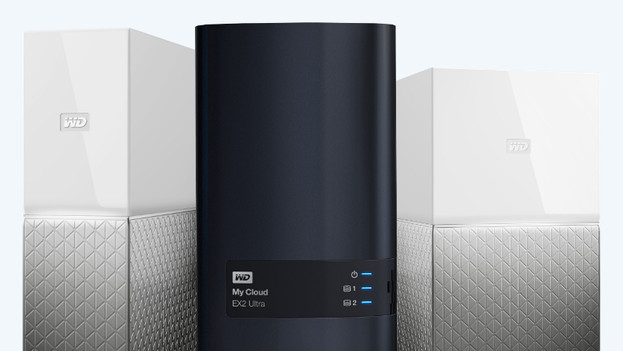
- My Cloud EX2 Ultra
- My Cloud EX2100
- My Cloud EX4100
- My Cloud DL4100
- My Cloud PR2100
- My Cloud PR4100
- My Cloud (Japanese version)
Update your WD NAS in 7 steps
- Step 1. Upgrade the firmware of your NAS
- Step 2. Select the OS update.
- Step 3. Start the update.
- Step 4. Renew your password for all users.
- Step 5. Set the accessibility.
- Step 6. Set your personal preferences.
- Step 7. Reinstall your old apps.
Step 1: upgrade the firmware of your NAS
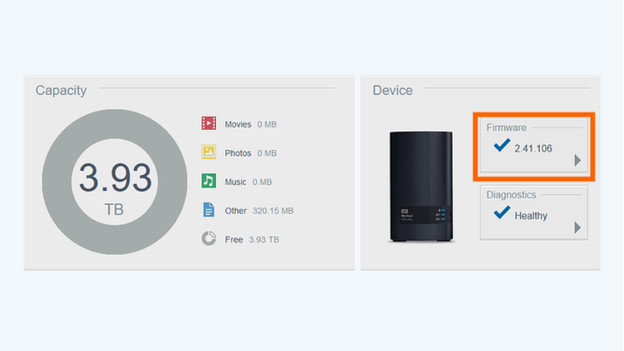
Before you upgrade to My Cloud 5, it's important that you have the latest firmware. Your WD NAS needs to have version 2.41.121 or higher for My Cloud OS 5 to work. You can find this firmware update on the WD Support site. Install the firmware on your NAD and sign in to the My Cloud Dashboard afterwards.
Step 2: select the OS update
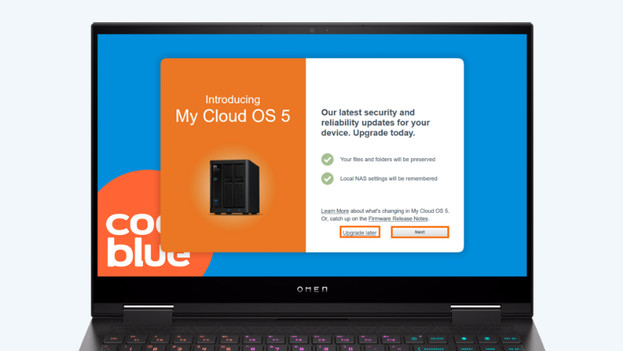
You'll see a white square with an orange border on the WD Dashboard. It says 'New OS available'. Select this box. Here, you can see a screen with 'Upgrade later' and 'Next' at the bottom. Click 'Next' and start the update. Keep in mind that the update is permanent, there's no way of going back to OS 2 or OS 3. These versions won't be supported anymore from 15 January 2022 and 15 April 2022. If your NAS already has OS 5, you won't see anything here. That also means you won't have to do anything.
Step 3: start the update
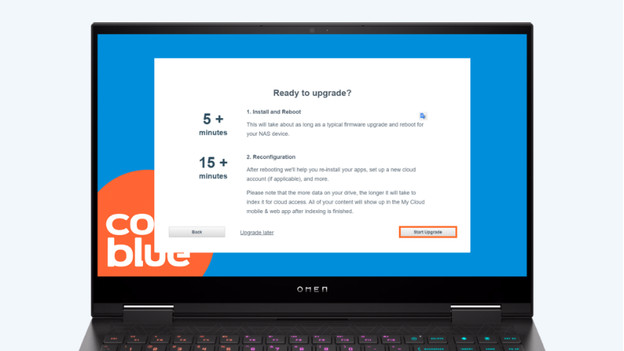
After you click 'Next', you get information about the installation process. You have to create a new Cloud account and reinstall your apps after the update, for example. In both cases, click 'Next' and then 'Start upgrade'. The update itself takes about 5 minutes and the installation takes 15 minutes. After the update, the NAS will restart before you can continue with the registration and setup
Step 4: renew your password for all users
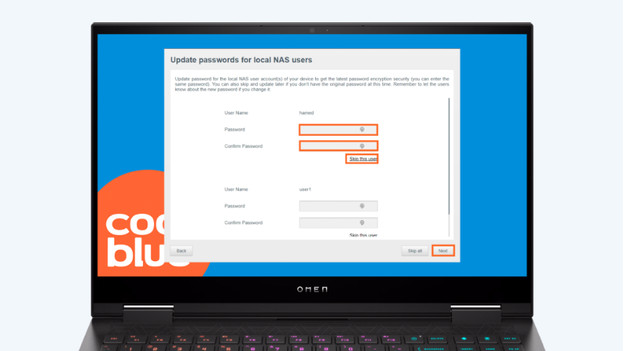
Once you've updated it, you have to set up the NAS again. On the login screen, enter your old OS 3 password and click 'Next'. Accept the conditions and create a new password for OS 5 on the next screen. Click 'Next' and create new passwords for the local NAS users on this screen. Enter the name of the user and come up with a password. Want to do this later? Click 'Skip this user' to return later.
Step 5: set the accessibility
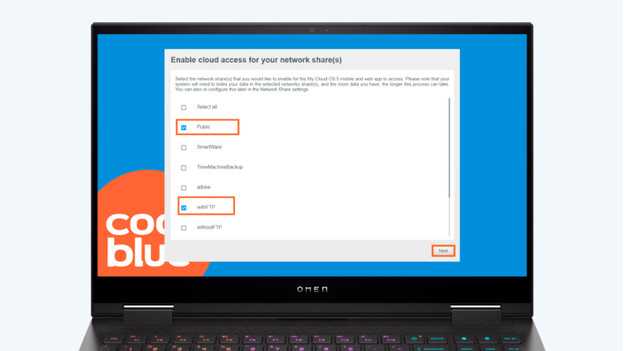
After you've created the passwords, you have to set the accessibility for the NAS server. If you want to do this at a later time. click 'Skip cloud access'. If you want to do it now, click 'Continue'. Create a new account here, or sign in with your new My Cloud OS 5 account. Click 'Next' and select the options you want to share with your network. The available options differ per NAS model and what each model supports. Are you done with the selection? Click 'Next'. You'll now be able to see whether you've successfully signed in. Click 'Next' again to set your personal preferences.
Step 6: set your personal preferences
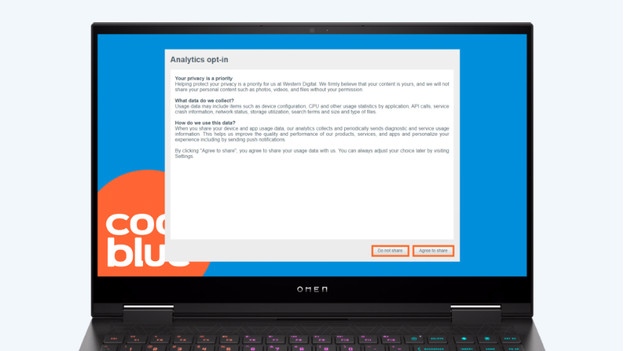
The final step of the installation is selecting your personal preferences.
- With 'Optimized video playback', the NAS makes a preview of your video. Click 'Yes' or 'No', depending on what you want.
- With 'Analytics opt-in', you share user's data with Western Digital to optimize the usage and to receive personalized notifications. Click 'Agree to share' or 'Do not share'.
Before you go to the final step, you get a list with the differences between your old My Cloud OS and OS 5. Read it and click 'Go to apps'.
Step 7: reinstall your old apps
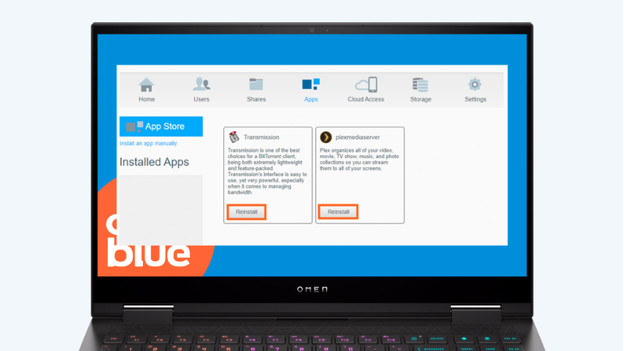
After the update and registration, the final step is to reinstall your old apps. Under the tab 'Apps', you'll see the 'App Store' in the left bar. Here, you can find the old apps that were installed on your last OS. Click 'Reinstall' below the app you want to use again and wait until it's been installed. You've now upgraded to My Cloud OS 5. Want to control the NAS via your smartphone as well? Install the accompanying apps via the WD website. WD My Cloud NAS is supported until 2026 at least.