How do you set up your GoPro HERO 10 Black?
Set up your GoPro HERO 10 Black in 7 steps

Your GoPro HERO 10 just came in and you'll get started right away. Here, you'll read how to set up the action camera.
Step 1: get the camera ready for use
Step 2: format your memory card
Step 3: determine the recording mode
Step 4: choose the image angle
Step 5: choose a video resolution
Step 6: set the selfie screen
Step 7: download the GoPro Quik app
Step 1: get the camera ready for use
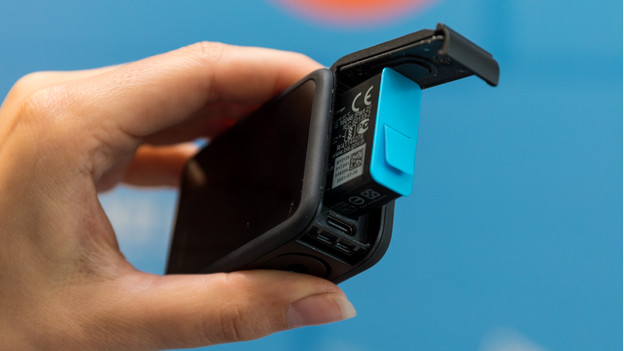
It's important that your HERO 10 uses a suitable memory card. We recommend a SanDisk Extreme or PNY Elite of at least 64GB. With this memory card, you won't be bothered with errors, and you can record videos without problems. Don't forget the memory card when you go out. Check if the battery is fully charged in advance, and set the general settings. Choose your preferred language and adjust the date and time.
Step 2: format the memory card
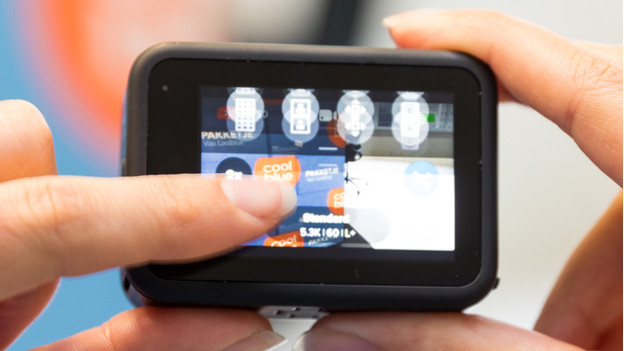
Format your memory card to be sure it's empty. You'll delete all files that might still be on there that way. Check if you've transferred all the important files beforehand. After formatting, the memory card will work best. Swipe down on the screen of your GoPro. A menu will appear. You can tap 'Preferences', followed by 'Reset'. Choose 'Format SD card'. The camera will now empty your memory card.
Step 3: determine the recording mode
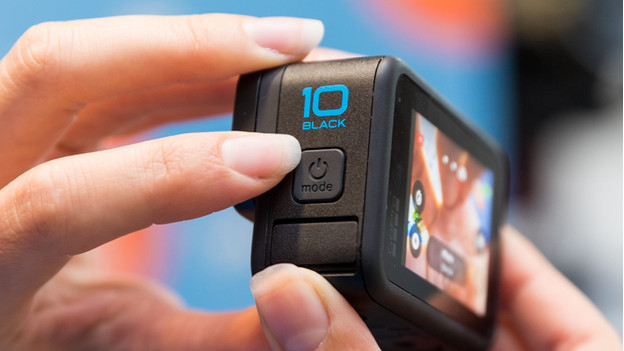
What type of recording do you want? You can choose between photo, video, or timelapse. You can easily adjust these modes by pressing the power button or swiping left or right on the screen. Within the chosen mode, you can adjust different settings. For example, you can choose the number of fps when you want to record. The higher the number of fps per second, the more you slow down the footage. With timelapse, you can change the interval between photos, for example.
Step 4: choose the image angle
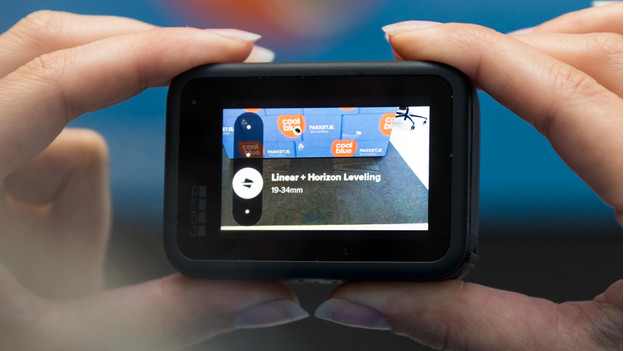
Your GoPro HERO 10 has different image angles, from superview to narrow. With superview, you'll have an extra wide image angle that allows you to capture landscapes for example. The wide viewing angle creates a convex in your image, also known as the fisheye effect. With the wide image angle, you'll also have a wide image, but the convex effect is less. If you choose linear or narrow, you'll have little to no distortion. And with horizon leveling, the camera keeps the horizon straight.
Step 5: choose a video resolution
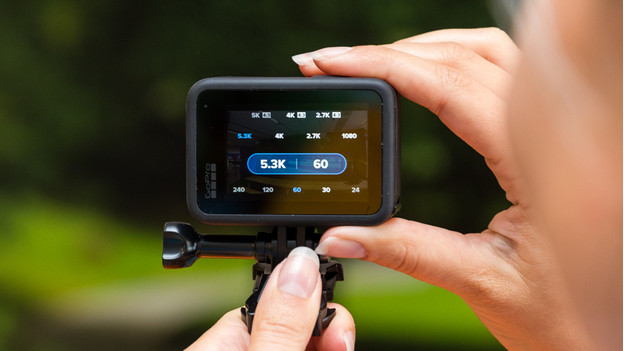
Set a video resolution when you start recording. With the HERO 10, the maximum you can record in is 5.3K with 60 fps. If you choose 4K, you can record with 120 fps. With 5.3K resolution, you'll have more pixels which allows you to see more details. Thanks to the high number of fps in 4K, this resolution is suitable for slow motion recordings. The higher the number of fps, the better you can slow down the footage. That way, you can highlight an action moment for example.
Step 6: set up the selfie screen
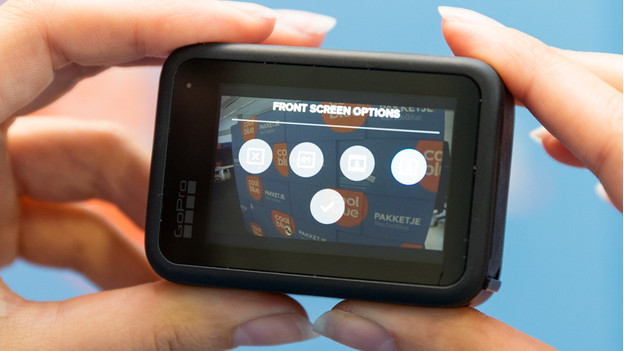
The selfie screen has different settings that you can adjust. Swipe downwards on the regular screen and go to the photo icon. You can now choose what you want to see on the selfie screen. With full screen, the image is completely filled and the sides fall out of the frame. If you want to see the full frame of your video, you should set actual screen. There will be black borders at the bottom and top of the screen. When you're not recording selfies or a vlog, you can completely turn off the screen.
Step 7: download the GoPro Quik app

After recording, you can easily edit the footage in the GoPro Quik app. You can merge different photos and videos, add music, and edit the colors with filters. In the Google Play Store by Android or the Apple App Store, you can find the app. When your video is done, you can directly share it via your social media.