Written by Giorgos
Edited on
11 July 2024
·
14:06
How do you set up the fingerprint sensor on your Windows laptop?
With a fingerprint sensor, your Windows laptop is extra secure. You can use this sensor to log in and make online payments. Thanks to your unique fingerprint, a sensor provides one of the best security options from hackers or when someone steals your laptop. In this article, we'll explain how to set up the fingerprint sensor.

Set up fingerprint sensor in 2 steps
Before you set up your fingerprint sensor, Windows will ask for a PIN code. You can set this via the same menu. Setting up your fingerprint is an easy process. We've listed the steps for you:
- Step 1a. Set up your fingerprint during the setup
- Step 1b. Go to 'Sign-in options'
- Step 2. Set up your fingerprint via the sensor

Step 1a. Set up your fingerprint during the setup
When you boot the laptop for the first time, Windows will ask you whether you want to set up the fingerprint sensor. It'll do this via the Windows Hello settings. To set up your fingerprint sensor, you also have to think of a PIN code here. Did you skip this step during the setup? No problem, go to step 2.

Step 1b. Go to 'Sign-in options'
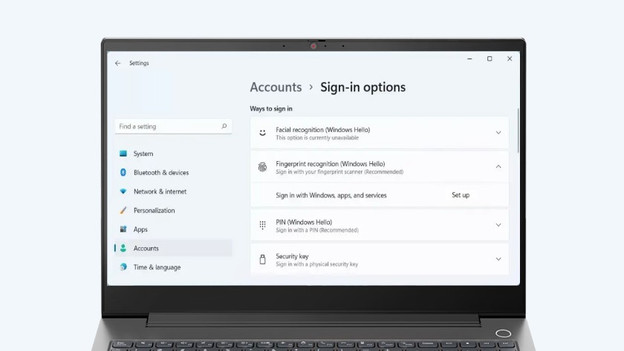
Didn't set up the fingerprint sensor when installing your laptop? Go to the settings menu and select 'Account'. In the left menu, select 'Sign-in options'. You can find all sign-in options here. You can also set up the facial recognition via your infrared webcam here. Think of a PIN code to set up the fingerprint sensor. Select 'Set up' and go to step 2.

Step 2. Set up your fingerprint via the sensor
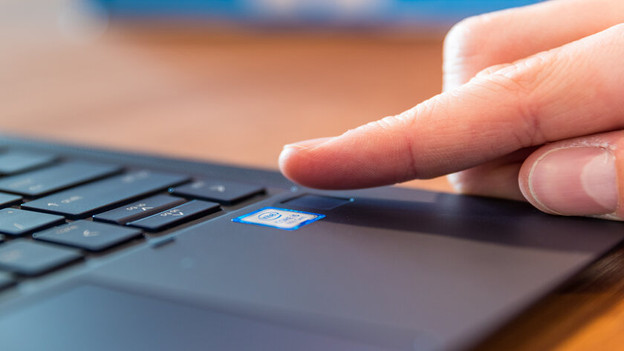
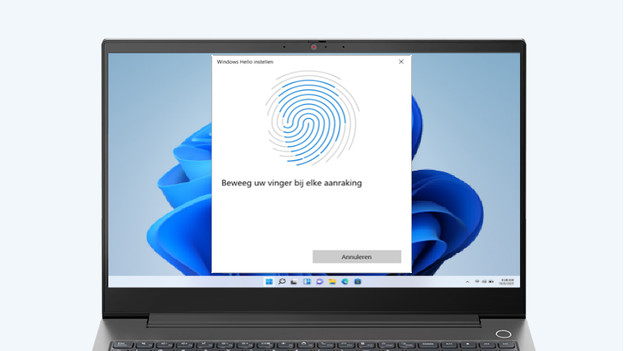
You'll now see a pop-up window with instructions. Place your finger flat on the sensor multiple times so you scan your entire fingerprint. Don't just put your fingertips on the sensor. Also make sure your fingers are dry before you begin the setup. The sensor can't scan wet fingerprints. The computer scans your finger a few times until the window indicates that you're done. Do you want to add more fingerprints? No problem, Windows will remember up to 10 fingerprints.
