Written by Laurence
Edited on
12 March 2024
·
16:01
How do you adjust the image settings of your Samsung TV?
In this article we'll explain how to adjust the image settings of your Samsung TV. You choose from a number of standard modes, such as 'Film', or adjust each feature in detail. Think of the brightness, sharpness, and contrast. This way you can easily choose the image settings that best suit your viewing situation or personal preference.
Adjust image settings in 4 steps
- Step 1: open the menu.
- Step 2: open Settings.
- Step 3: open Image.
- Step 4: adjust the Image Mode or Expert Settings.


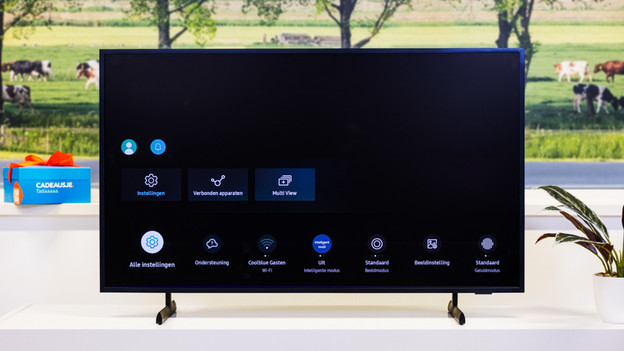
Step 2: open 'Settings'
Go to the left in the menu bar until you reach Settings. Select this option.

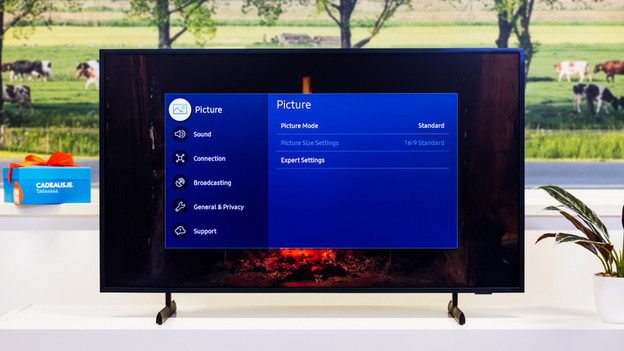
Step 3: open 'Picture'
You can choose from Image Mode or Expert Settings. Go to Image mode if you want to choose a default setting. To adjust the image in detail, go to Expert Settings.

Step 4a: adjusting the Image mode
With the Image Mode, you can choose from different default settings. Each setting has a different effect on the brightness and the black and color representation.
Adjusting Image mode
| Mode | Explanation |
|---|---|
| Dynamic | This makes the image extra bright. This is especially useful in brightly lit rooms where you're more likely to be bothered by reflections. The disadvantage is that it makes the color and black levels less accurate. |
| Stand | This mode is bright enough to prevent reflections in a normally lit room. The color and black levels are better than in Dynamic Mode, but not optimal. |
| Natural | In this mode, the color and black levels are more realistic than when you select Standard, but the image is less bright. This makes the screen more susceptible to reflections. |
| Film | This mode is especially suitable when watching a movie at night. The color and black levels are the best. Due to the lower brightness, the screen is susceptible to reflections. |
| Filmmaker mode | The Filmmaker mode displays your image as the director intended. It switches off effects, such as smoother moving images. The color temperature is also warm, which makes white appear more yellow. |

Step 4b: adjusting the Expert settings
On this screen you can adjust each individual image property. The best setting depends on your viewing situation and personal preference. Experiment with the settings and create the image that you like the most. In this list you can see what each function is for. Note that the available functions differ per TV. If you have a standard image or game mode switched on, you may not be able to adjust some settings.
Adjusting Expert settings
| Setting | Explanation |
|---|---|
| Backlight | Make the background lighting lighter or darker. |
| Brightness | Adjust the overall brightness of your TV. |
| Contrast | Make the difference between the lightest and darkest images larger or smaller. |
| Sharpness | Sharpen or blur the edges of objects. |
| Color | Adjust the color saturation. Colors with a high saturation look brighter and more intense. |
| Hue (G/R) | Emphasize the green or red hues. |
| Apply image settings | Choose whether to apply the settings to 1 source or to each device connected to the TV. |
| Clean Digital View | This controls the noise suppression. This is useful when viewing an image with a low image quality. |
| Auto Motion Plus | Make the image extra smooth. This option is especially recommended when you watch sports matches. This mode is less pleasant when watching movies and series. You can darken the screen with LED Clear Motion. |
| Local dimming | Set how aggressively the TV adjusts the backlight to the dark and light areas of the screen. |
| Contrast enhancement | Automatically make the difference between the lightest and darkest display larger or smaller. This is useful when looking at an image with poor contrast. |
| HDR+ mode | Upscale SDR images to HDR. You will mainly notice a higher brightness and more intense color reproduction. |
| Color tone | Adjust the color tone to a standard or cool color. |
| RGB mode | Enhance the red, green, or blue tones of the image. |
| White balance | Adjust the color temperature so that white images become extra bright. |
| Reset image | Are you not satisfied with your adjustments? Then you can reset all settings with this option. |
Article by Laurence
Television Expert.

