Get started with a Fujifilm Instax camera
Step 1: insert the batteries
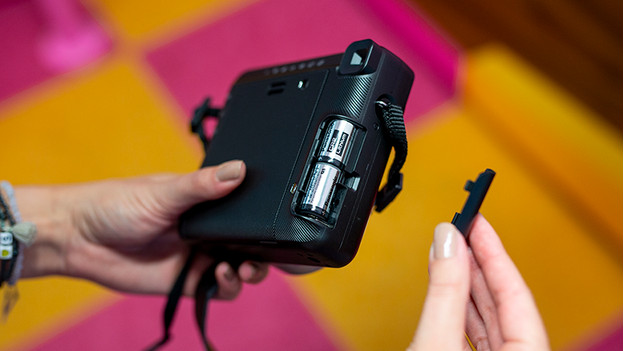
The first step to using your Fuji Instax camera is inserting the batteries. On the side of the camera, you'll find the battery compartment. Remove the lid and insert the 2 batteries. The right direction is indicated in the compartment. Next, you put the lid back in place over the battery compartment by placing the tabs in the notches. Push the lid down until you hear a click.
Step 2: put the film pack in the camera

At the back of the camera, you'll find a large hatch. You place the film pack inside. First, you move the slider down and open the hatch. Next, you take the film pack out of its packaging. Hold the pack on both sides, otherwise you'll damage the film. You'll find yellow markings underneath the hatch and on the film pack. Align these as you place the pack into the device straight. Close the hatch again.
Step 3: load the film pack
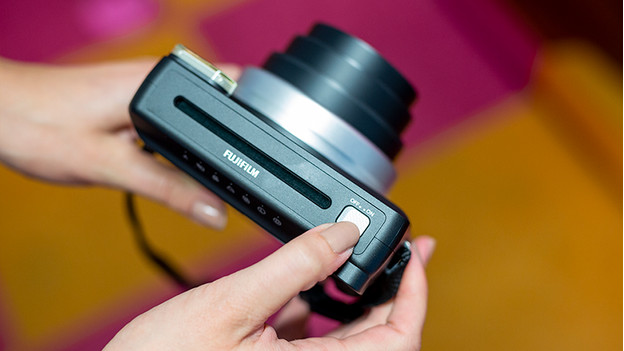
In order to load the film pack, you first have to turn on the camera. You do this by moving the main switch to 'ON". Don't hold the camera by the lens, because it will now extend. Once the camera is on, you push the shutter release button. You can find it on the front of the device. A black protective sheet will slide out. Remove the sheet carefully. If you now see a '10' next to the rear hatch, the pack has been loaded.
Step 4: choose the right camera setting
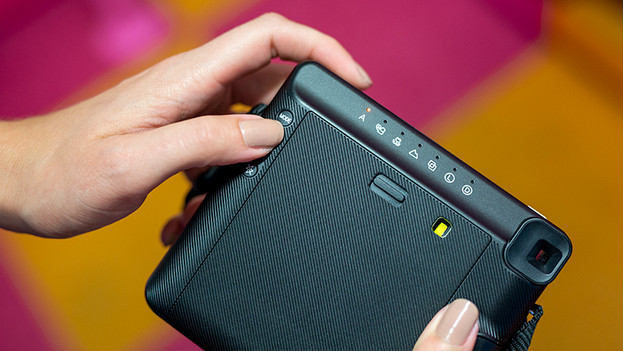
If everything went according to plan, your camera is now still on. It depends on the type of Instax camera which settings you can adjust before you take a photo. If you're making your first photo, you can leave these options for now. Some devices have an automatic setting. This is the option that the camera uses by default. If you see a red light burning below the 'A', you'll know the device is set to this setting.
Step 5: take a photo and pull out the film
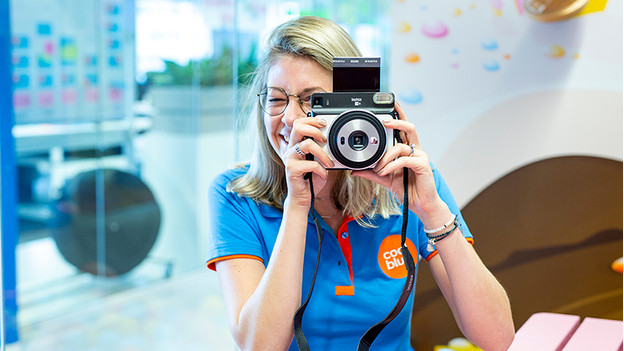
Look through the viewfinder to see if everything fits in the frame. Next, you print a photo by pushing the shutter release button on the front of the camera. It's possible that a red light will start to blink. That means you'll have to wait for the flash to charge. Once you've printed, the film will come out slowly. Hold the film by the edge and pull it out of the camera. It takes about 90 seconds to develop.