Written by Giovanni
Edited on
12 July 2024
·
15:23
How do you connect the SteelSeries Arctis Pro Wireless to your PS4?
The SteelSeries Arctis 7 Pro Wireless is an awesome wireless gaming headset which allows you to control the volume of your game and chat separately. But to get the most out of this, it's important you connect and set up the Pro Wireless to your PS4 correctly. You can read how to do this here.

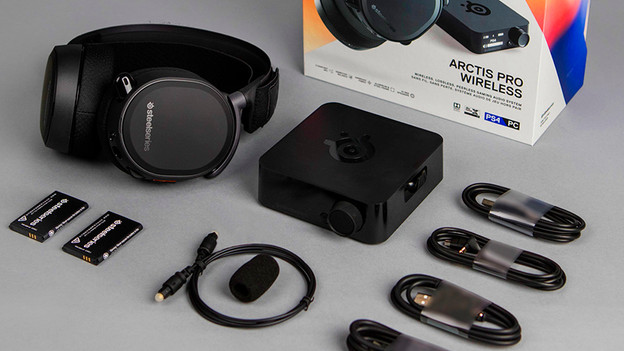
What's included in the box?
To get started, I first take all the components out of the box.
- Artcis Pro Wireless headphones
- Wireless receiver
- USB audio cable
- Power cord
- 3.5mm audio cable
- Optical cable
- Batteries for the Arctis Pro (2x, one is already placed)

Connect to your PS4 Pro
- Place the wireless receiver close to (but not on) your PS4 Pro.
- Connect the USB cable to the wireless receiver and your PS4 Pro.
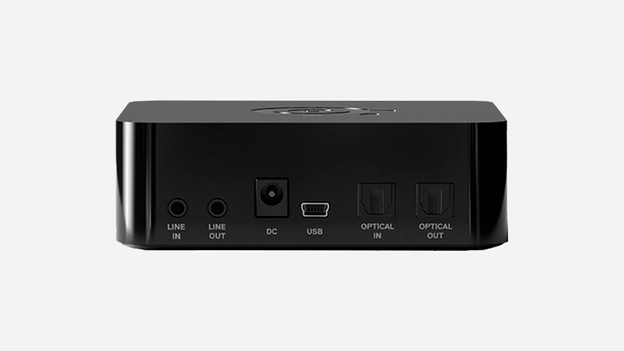
- Connect the Optical cable to the backside of the receiver to the port that says 'Optical in'.
- Connect the other end of the optical cable to the 'Optical out' port of your PS4 Pro.
Tip: always on
This step is optional, but very useful. By connecting the base station to a power cable to a socket as well, the base station is always on. This is useful, because it charges your secondary battery, even while your PS4 isn't on.
Set up Artcis Pro Wireless on your PS4 Pro
- Turn on your PlayStation, go to 'Options', and choose 'Sound and screen'.
- Go to 'Audio output settings' and select 'Digital out (Optical)' at 'Primary output port'.
- Choose 'Bitstream (Dolby') at 'Audio format (priority)'.
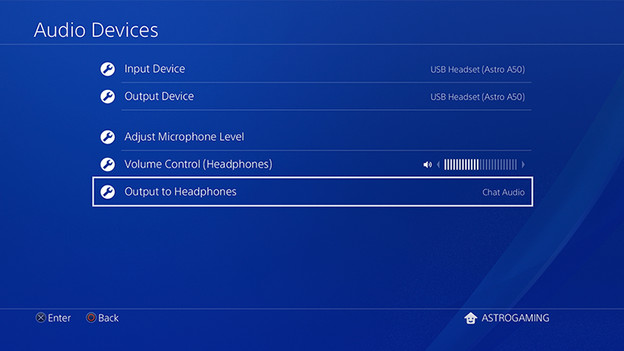
- In the main menu, choose 'Devices' and 'Audio Devices'.
- At 'Output to Headphones', select 'Chat Audio'.
For the best quality, connect your Arctis Pro to the Optical port.
Pass the sound through the optical port.
Get started
Turn on the Arctis Pro headset by pressing the 'Power' button on the right ear cup for 2 seconds. The white light goes on and the headset automatically connects to the wireless receiver. With these settings, your chat audio goes via USB and the game audio via the optical cable. This way, you can control the two channels separately.


